12 Eco Friendly Halloween Ideas at Home for 2026
Finding creative eco friendly Halloween ideas at home can help you transform your living space into a spooky, beautiful, and welcoming environment without spending money on unnecessary decorations. Halloween decorating does not have to involve disposable plastic props, expensive store bought ornaments, or decorations that end up in the trash after one night. With a little imagination, you can use old clothing, recycled cardboard, glass jars, fallen leaves, and other household materials to create a memorable Halloween atmosphere.
In 2026, handmade decorations, nature inspired textures, moody witchy displays, and reusable seasonal accessories offer plenty of inspiration for sustainable decorating. These styles allow you to express your personality while making thoughtful choices about the materials you use. Whether you live in a small apartment, a rented house, or a spacious family home, you can create beautiful decorations that suit your budget and available space.
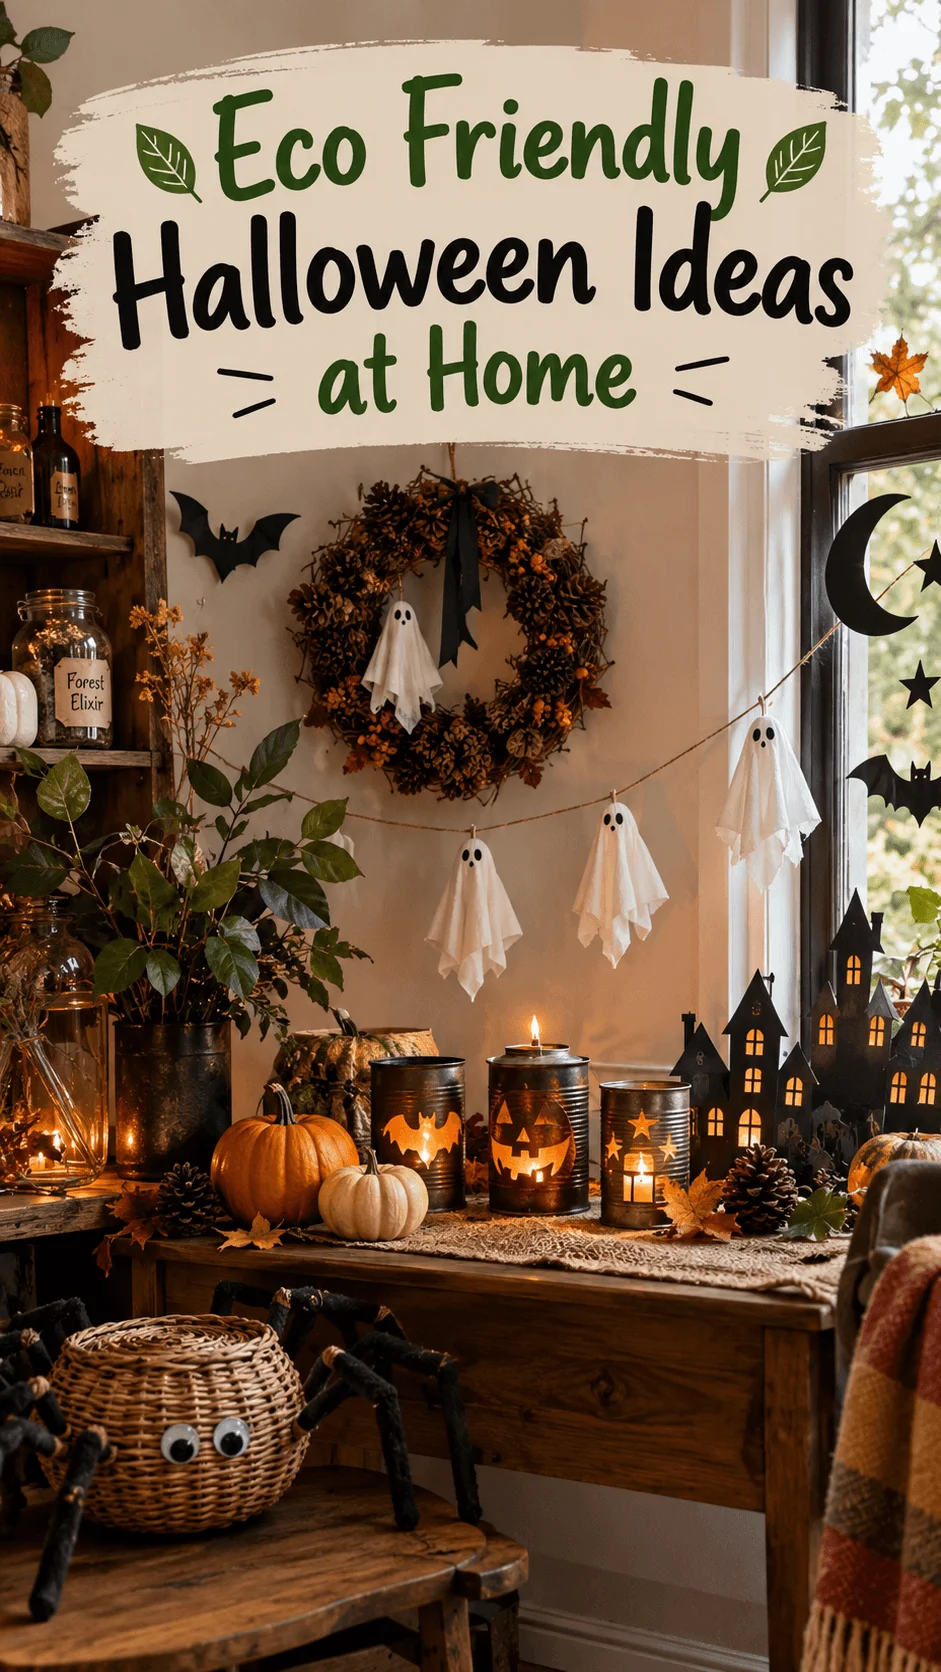
The best part is that many projects require only basic supplies and a little creativity. You can involve your family, experiment with different styles, and create decorations that you will want to bring out again next October. This guide explores twelve practical projects that combine creativity, affordability, and sustainability.
Why Choose Eco Friendly Halloween Decorations?
Traditional Halloween decorations often include plastic spiders, synthetic cobwebs, disposable banners, foam pumpkins, and other items designed for temporary use. Although these products can look attractive, buying new decorations every year can increase household spending and unnecessary waste. Choosing reusable materials offers a practical alternative.
One of the biggest advantages of sustainable Halloween decorating is affordability. Instead of purchasing an entirely new collection, look around your home for cardboard boxes, old sheets, empty jars, fabric scraps, and leftover craft supplies. These everyday objects can become impressive decorations with only a few simple changes.
Another benefit is creative freedom. Homemade decorations allow you to choose colors, shapes, and themes that match your interior. You might prefer a rustic autumn display, a mysterious witch inspired shelf, or a playful Halloween arrangement for children. You can customize every detail rather than relying on mass produced designs.
Sustainability also involves thinking about what happens after the celebration. Store durable decorations carefully so you can reuse them next year. Compost suitable untreated natural materials where local facilities allow it, and recycle paper, cardboard, or metal when they meet local recycling requirements.
The goal is not to make every decoration perfect or eliminate every environmental impact. Instead, focus on using what you already own, avoiding unnecessary purchases, and choosing materials that serve a useful purpose beyond Halloween.
12 Eco Friendly Halloween Ideas at Home
The following projects combine traditional Halloween imagery with creative reuse. Each one offers opportunities to personalize your home while keeping costs and unnecessary waste under control.
1. Recycled Paper Bat Wall for Sustainable Halloween Decor
A recycled paper bat wall creates a dramatic Halloween display without requiring expensive decorations. Black bats flying across a white wall create a striking contrast, while a collection of different shapes gives the room a playful, spooky atmosphere.
Start by gathering old black paper, used folders, cardboard packaging, or sheets from previous craft projects. If you only have ordinary cardboard, you can leave it natural for a rustic appearance or decorate it with leftover paint you already own. Draw several bat shapes in different sizes and cut them out carefully.
Arrange the bats on the floor before attaching them to the wall. Place a few small bats near the starting point and gradually increase their size as the arrangement spreads across the wall. This creates the impression that a flock is flying through the room. You can direct the pattern toward a doorway, staircase, fireplace, or window.
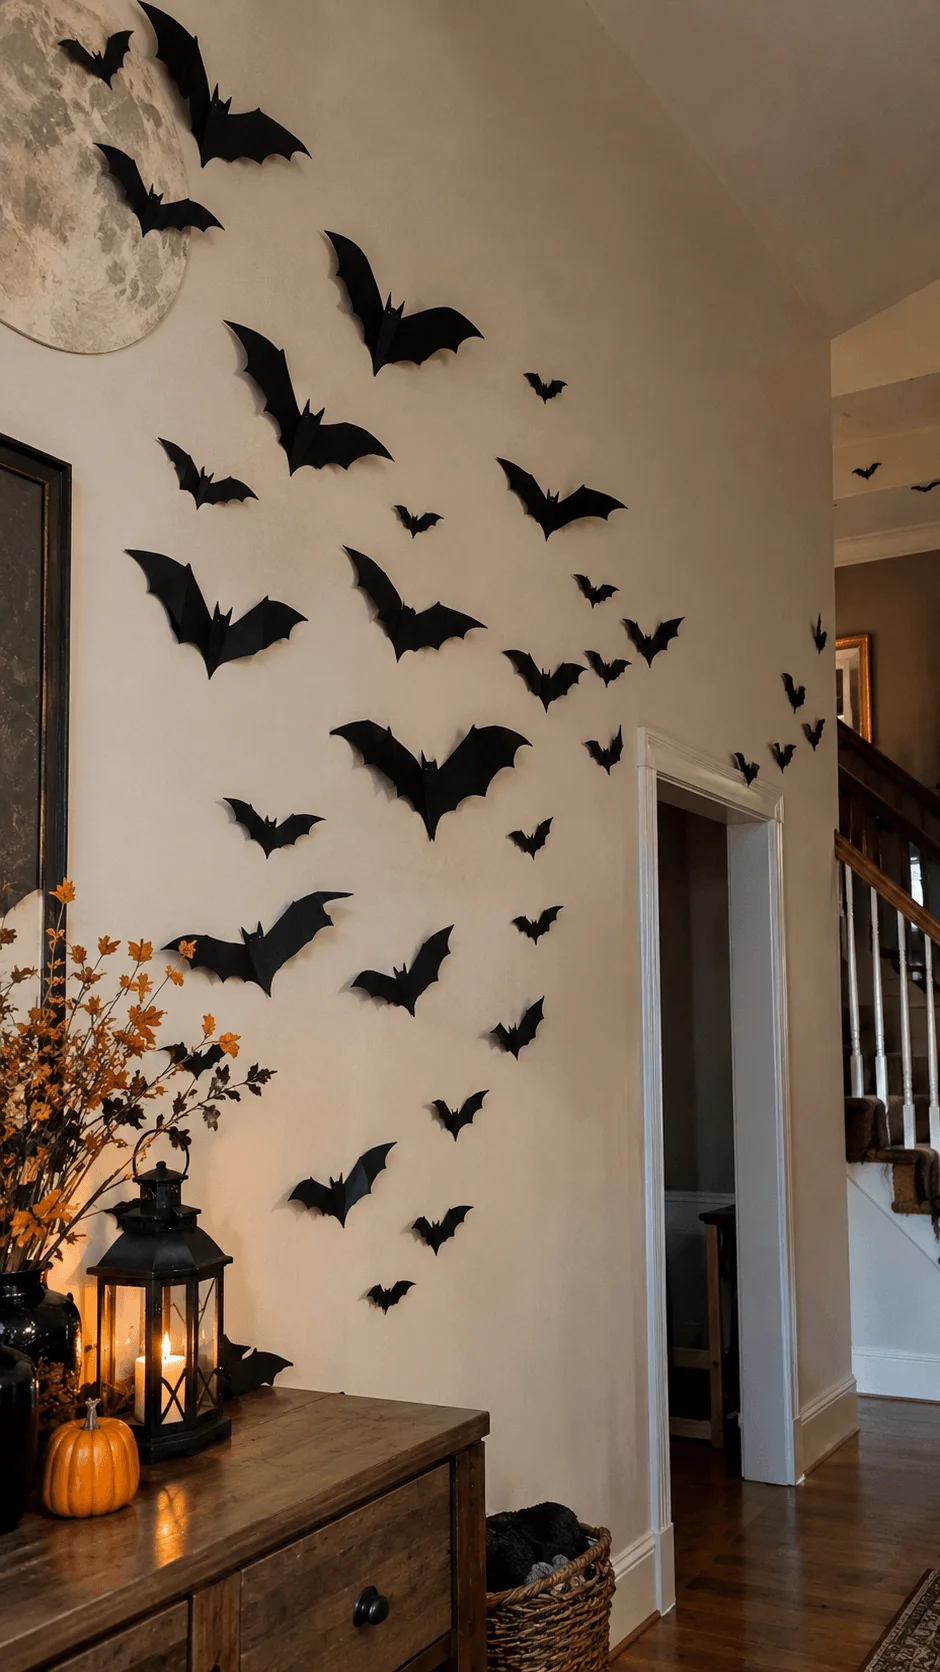
For a more interesting design, fold the wings slightly to give some bats a three dimensional appearance. Keep others flat against the wall to create depth. You can also combine the display with an existing Halloween wreath or a handmade paper moon.
Use removable attachment materials that suit your wall surface and test them in an inconspicuous area first. Avoid strong adhesives that might damage paint, particularly in rented homes.
This project works well because you can store the bats flat in an envelope or box after Halloween. Next year, rearrange them in a different pattern or combine them with paper stars and moons. Reusing the same decorations helps you create a fresh look without buying new supplies.
2. Old Sheet Ghost Garland for a Cozy Halloween Atmosphere
Ghost garlands offer a simple way to make a room feel festive. Their soft fabric texture creates a warmer appearance than many plastic decorations, and you can make them from old cotton sheets, worn pillowcases, or clean fabric scraps.
Begin by cutting the fabric into squares or circles. The size depends on whether you want tiny ghosts for a shelf or larger figures for a doorway. Place a small ball of fabric or another lightweight material in the center of each piece, gather the fabric around it, and tie the neck with reusable string or leftover ribbon.
Add simple faces using small pieces of suitable fabric or reusable decorative details. Keep the design minimal if you prefer a modern look, or make each ghost slightly different for a playful display.
Attach the finished ghosts to a length of string, leaving enough space between them so they hang freely. You can place the garland above a fireplace, across a window, along a bookshelf, or around an indoor party table. For a children’s room, smaller ghosts in different sizes can create a charming seasonal decoration.
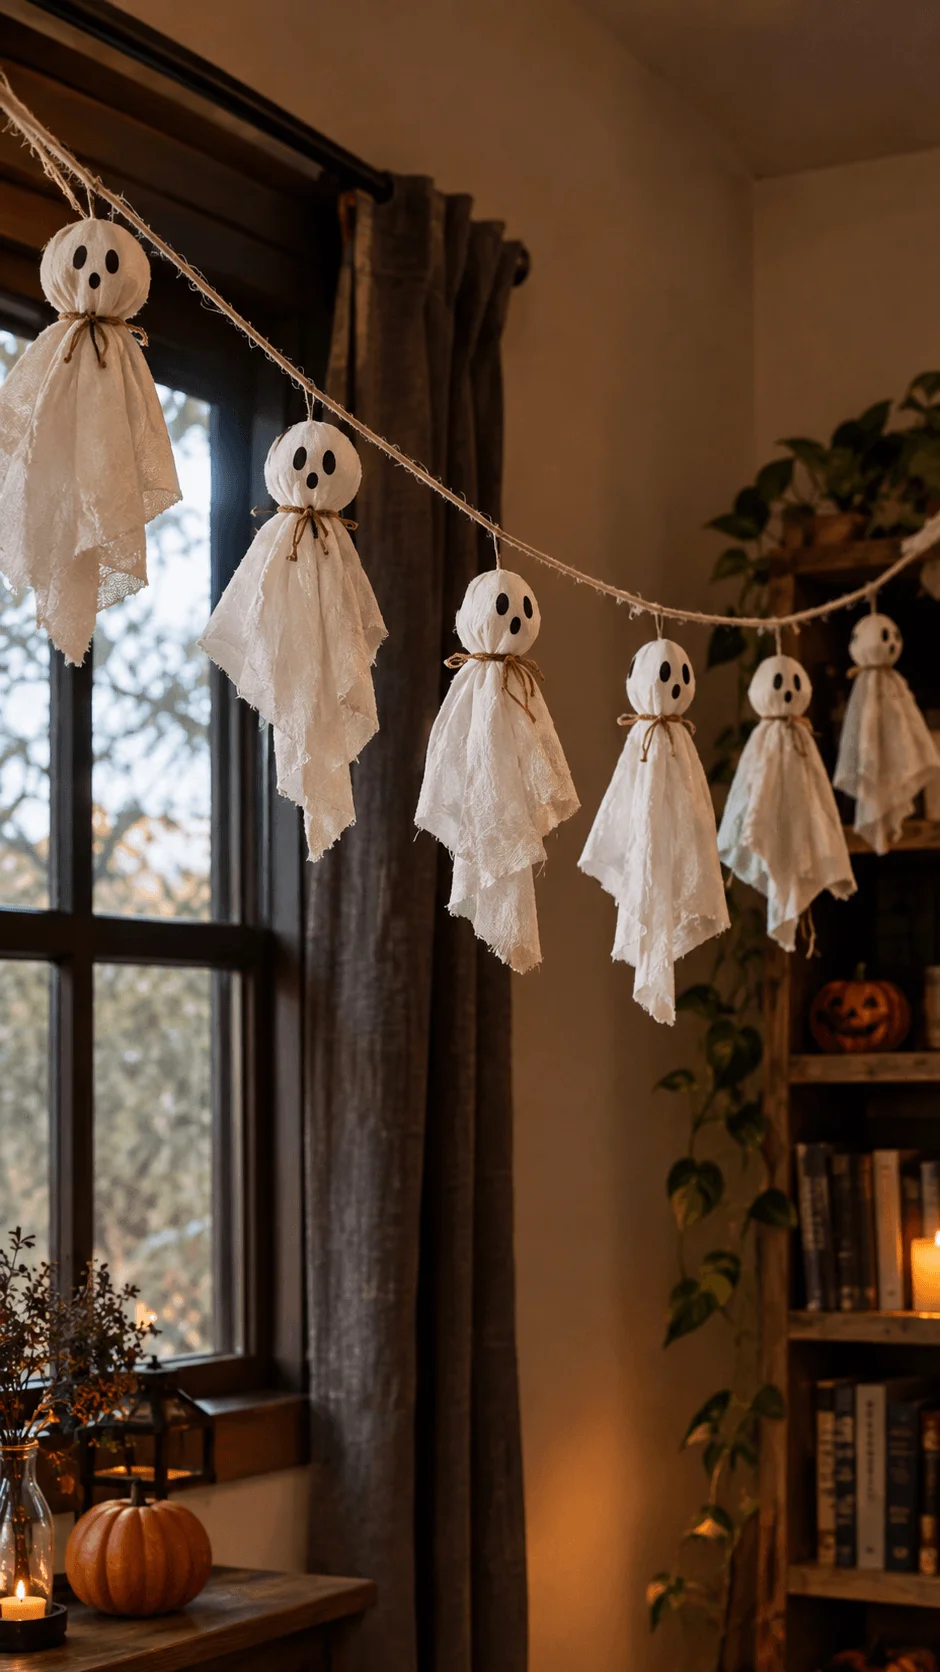
You can also personalize the project with fabric in different shades. White and cream create a traditional ghostly appearance, while pale grey fabric gives the display a more muted, vintage feel. Avoid using valuable clothing or textiles that you still need for everyday use.
Old fabric offers an advantage because you can wash it when appropriate, fold it neatly, and store it for future celebrations. After Halloween, remove any temporary decorations and keep the fabric pieces with your other seasonal accessories. If the material becomes unusable, consider textile recycling where available.
3. Natural Autumn Leaf Garland for Eco Friendly Halloween Decorating
A natural autumn leaf garland brings the colors of the season indoors. Orange, yellow, brown, and reddish leaves can create a beautiful display that feels festive without relying on newly purchased plastic foliage.
Look for fallen leaves in your garden or in places where collecting them is permitted. Choose leaves with interesting shapes and colors, avoiding protected plants or areas where removing natural material could disturb wildlife. Check each leaf for insects, dirt, and moisture before bringing it inside.
Allow the leaves to dry completely. You can press suitable leaves between sheets of paper under a heavy book to help them lie flat. Once dry, arrange them according to color and size before attaching them to reusable string. Handle fragile leaves gently because dried foliage can break easily.
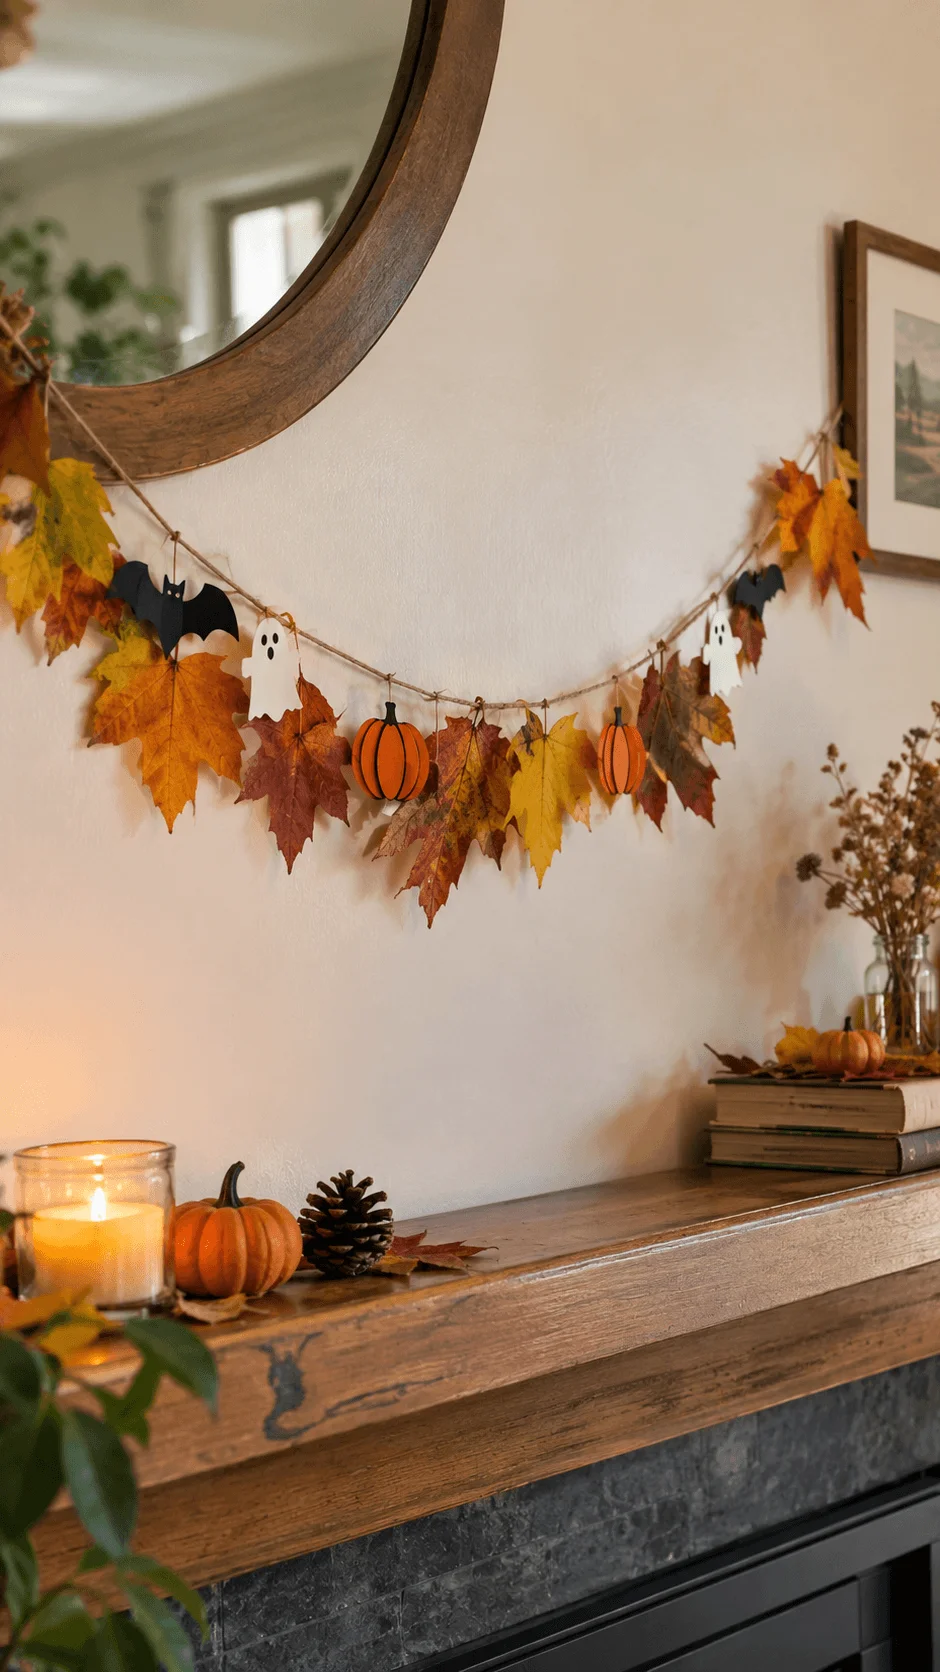
For a Halloween theme, combine the garland with recycled paper bats, small cardboard pumpkins, or a few handmade ghosts. You could place it along a mantel, across a dining table, around a mirror, or above an entryway. A mixture of leaf sizes creates a more natural appearance than a perfectly uniform arrangement.
If you prefer a rustic style, use simple twine and keep the colors natural. For a more dramatic display, add dark paper shapes and place the garland against a light colored wall. You can also combine it with existing glass jars or wooden ornaments for a coordinated autumn display.
Natural leaves have a limited lifespan indoors, particularly when the air is humid. Keep them away from damp surfaces and replace them if they develop mold. At the end of the season, compost suitable untreated leaves or return them to an appropriate outdoor composting area.
This project also transitions easily into general autumn decorating. Remove the Halloween elements after October, and the remaining leaf garland can continue to decorate your home through the fall season.
4. Upcycled Witchy Apothecary Shelf for a Mysterious Look
A witchy apothecary shelf is an excellent option if you enjoy dark, atmospheric Halloween styling. Instead of purchasing themed bottles and decorative props, you can create a mysterious arrangement using empty glass jars, old bottles, wooden trays, books, and other objects already in your home.
Start by collecting clean, empty containers in different shapes and sizes. Clear glass creates a classic potion bottle appearance, while existing amber or green glass adds depth to the display. Remove any labels that come off easily, but do not damage reusable containers simply to achieve a particular look.
Create decorative labels from leftover paper or the blank sides of used packaging. Write imaginative names such as Moon Dust, Forest Elixir, or Midnight Brew. These labels add personality without requiring professionally printed stickers. Attach them with a suitable removable adhesive or tie them around the bottle necks with reusable string.
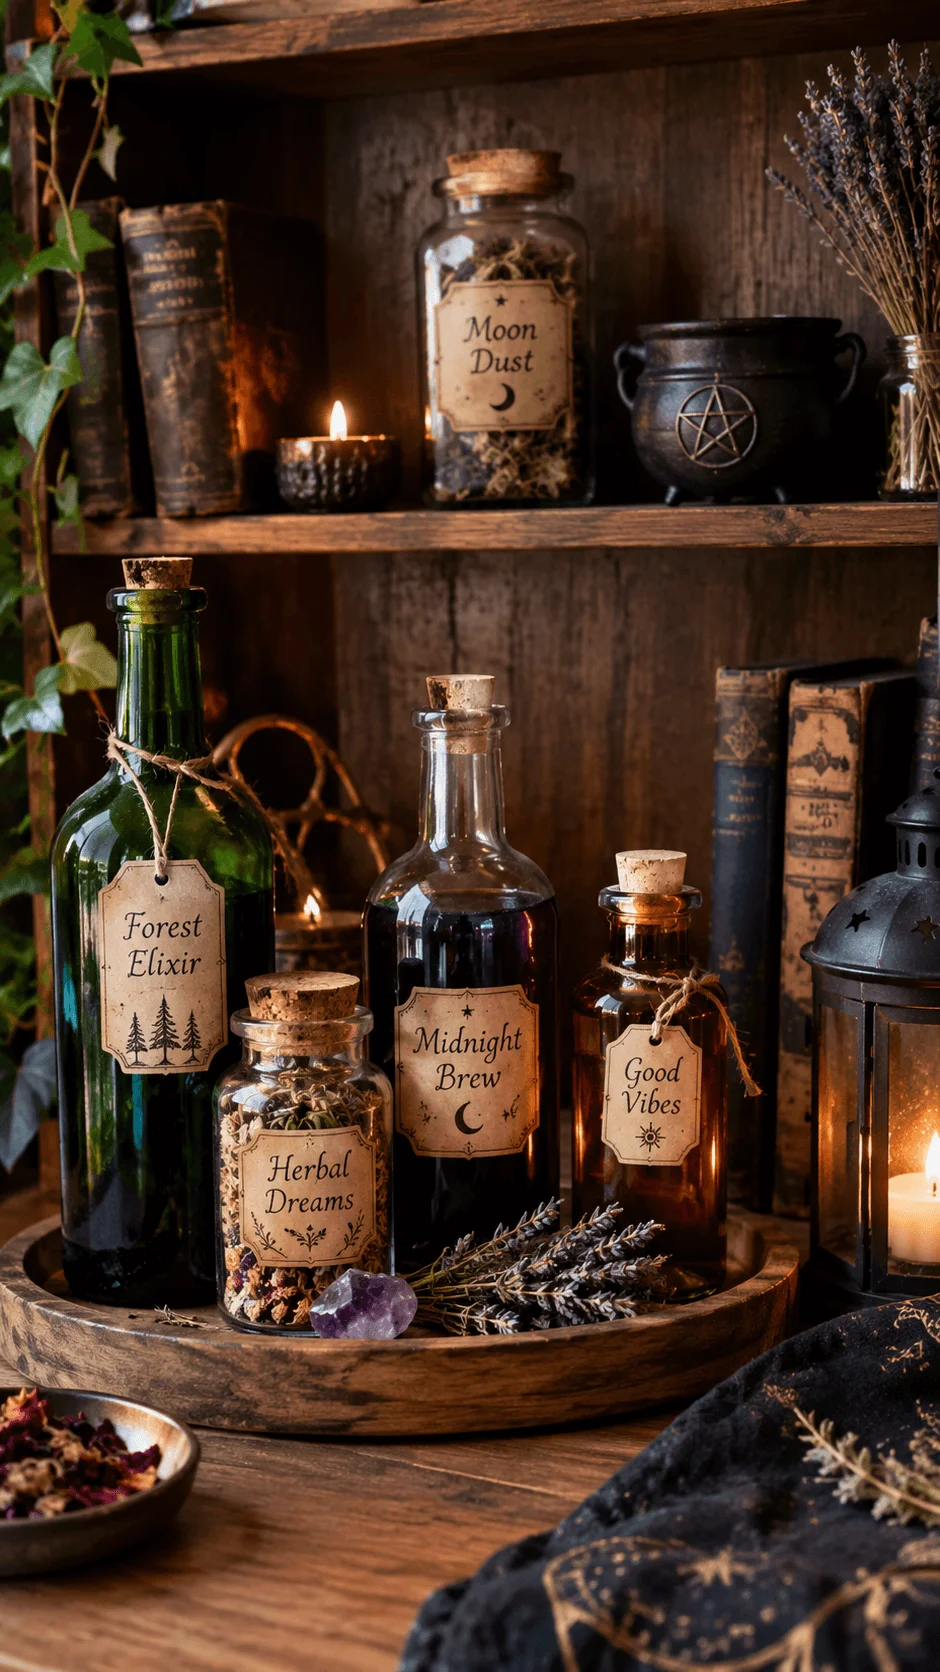
Next, arrange the containers on a wooden tray, shelf, or side table. Place taller bottles toward the back and shorter jars toward the front. This simple arrangement allows each piece to remain visible. Add old books, dried plant material, dark fabric, or existing ornaments to make the display look layered and interesting.
For a contemporary witchy aesthetic, use deep purple, muted green, brown, and black accents. If you prefer a softer appearance, combine the jars with natural wood and warm autumn colors. The display can work in a living room, on a bookshelf, or on a small table near the entrance.
You can also use handwritten paper tags to explain the fictional purpose of each bottle. Keep the contents decorative and safe, and never place hazardous substances inside containers that someone might mistake for ordinary household products. Secure fragile glass items, especially in homes with young children or pets.
The greatest advantage of this idea is its versatility. After Halloween, remove the temporary labels and return suitable jars to ordinary storage or household use. Store the remaining accessories together so you can recreate the display next year with very little effort.
5. Reused Can Lantern Display for a Spooky Evening Glow
Lanterns can make Halloween evenings feel warm and atmospheric. Reusing suitable empty metal cans offers a way to create decorative light holders while giving an ordinary household item a second purpose.
Begin with clean cans that have no sharp or damaged edges. An adult should handle any cutting or piercing required to create decorative openings. Carefully remove hazards before anyone handles the finished lantern. If you do not have a safe way to prepare the cans, choose an easier alternative, such as decorating the outside of an intact can without cutting it.
You can create a moon and star theme by painting simple shapes on the exterior or attaching paper designs to the outside. For a classic Halloween look, use silhouettes of bats, pumpkins, or crooked trees. Leftover paint can add color, but choose a suitable product and allow it to dry completely before using the decoration.
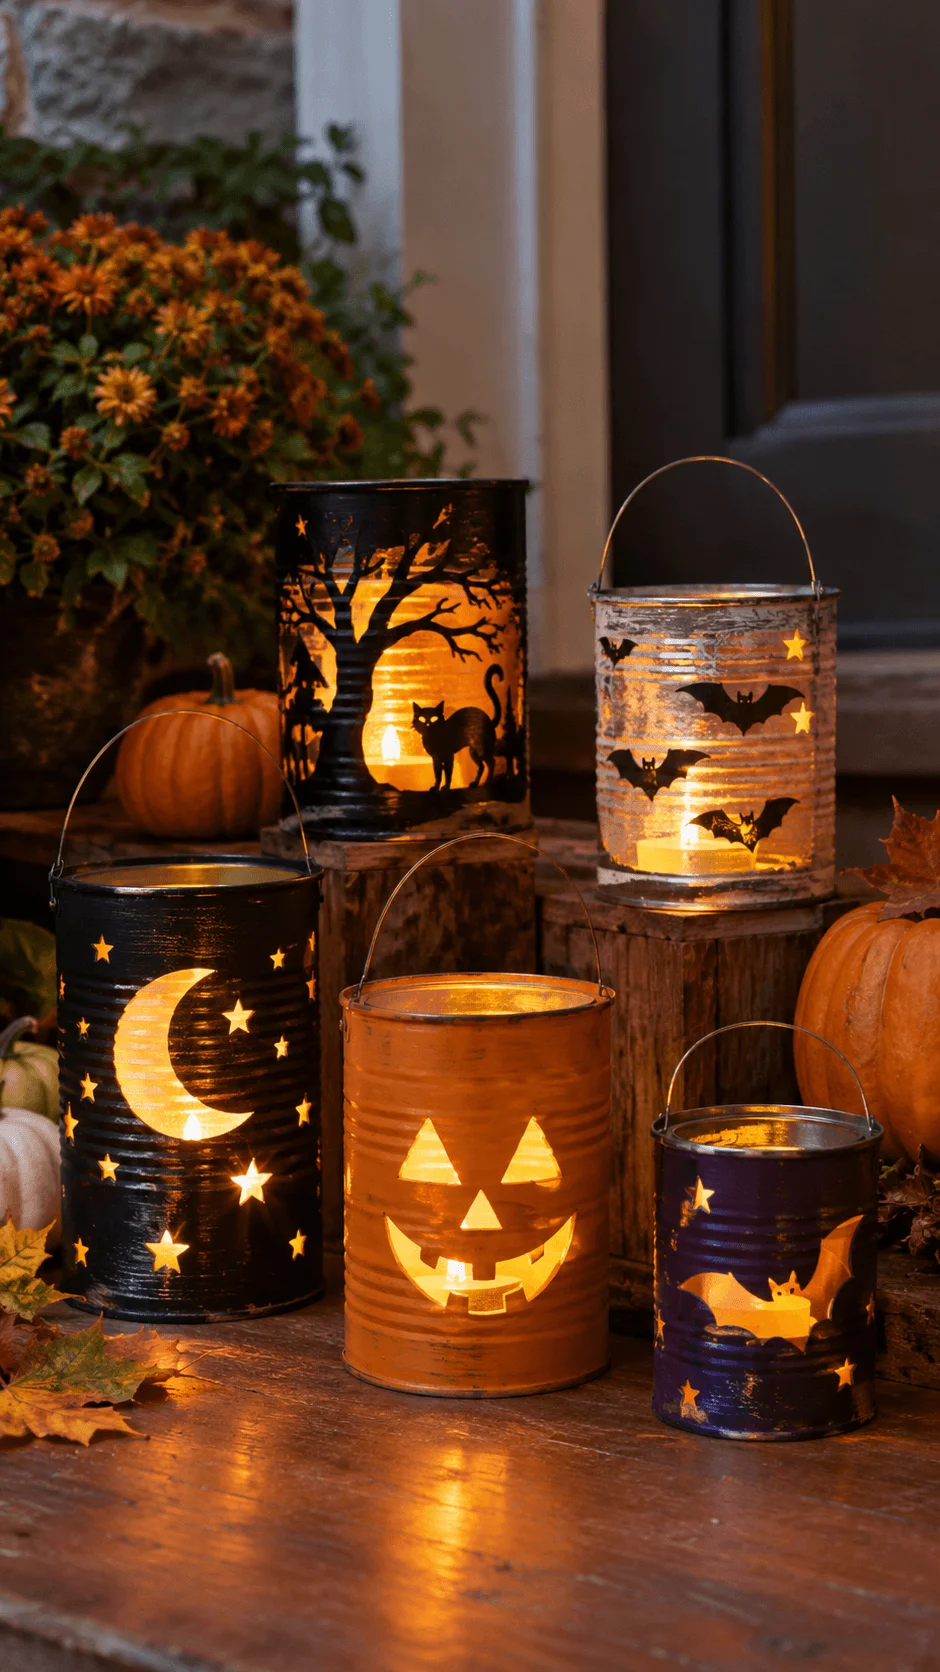
Place a battery powered LED light inside each prepared lantern. These lights provide a decorative glow without an open flame. Avoid overheating, keep the lanterns away from flammable materials, and place them on stable surfaces where people will not knock them over.
Arrange several lanterns of different sizes on a table, shelf, or covered entrance area. You can surround them with existing autumn decorations or a few natural objects to create a coordinated display. Keep outdoor decorations protected from rain unless their materials and lighting are designed for outdoor conditions.
After Halloween, remove the lights, clean the cans, and store the decorations in a dry place. Reuse them next year or recycle the metal through an appropriate local service when the cans no longer serve a useful purpose.
6. Twig and Pinecone Halloween Wreath for a Natural Entrance
A twig and pinecone wreath creates a welcoming entrance while bringing natural textures into your Halloween decorating scheme. Unlike a wreath made entirely from disposable plastic materials, this project can use fallen natural objects, an existing wreath base, and ribbon saved from previous celebrations.
Begin by checking your storage area for an old wreath base. If you already have one, reuse it instead of buying another. Gather suitable fallen twigs and pinecones from places where collecting them is permitted. Choose dry materials without visible mold, and inspect them carefully before bringing them indoors.
Arrange the twigs around the base to create a balanced circular shape. Secure them with suitable reusable ties or existing craft wire, taking care to keep sharp ends away from the finished surface. Add pinecones around the wreath, spacing them so the overall design looks balanced rather than crowded.
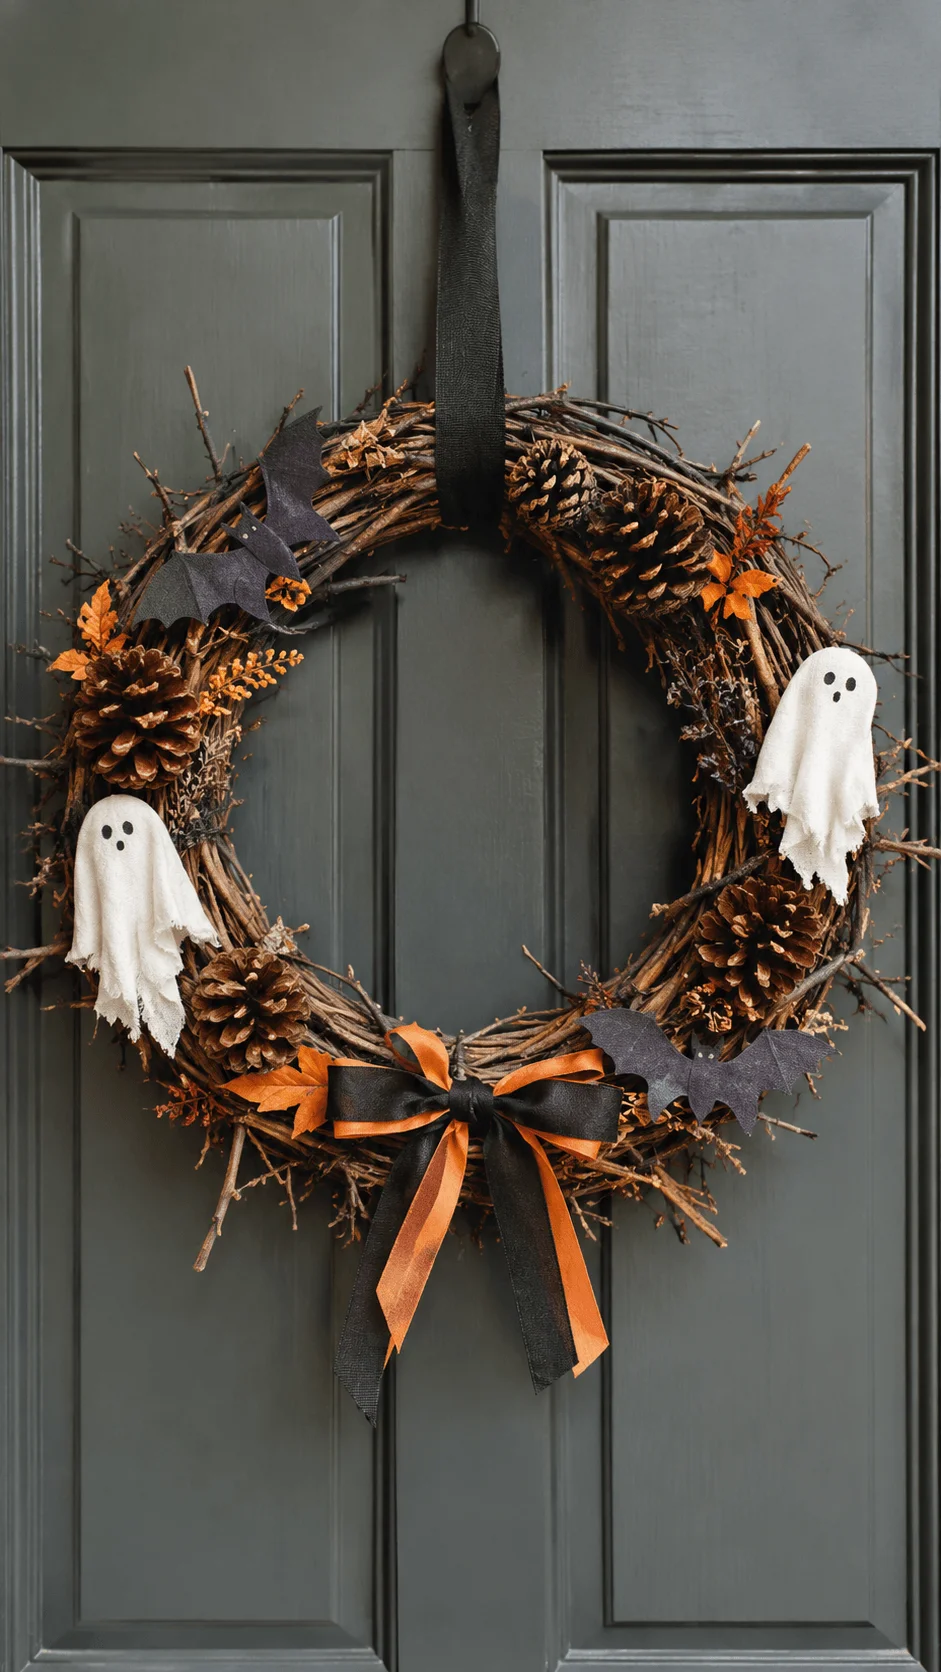
To make the wreath more recognizably Halloween themed, add a few recycled paper bats, small fabric ghosts, or a dark ribbon saved from an older project. You can also introduce orange or muted purple details if those colors suit your entrance. Keep some of the natural material visible so the wreath retains its rustic character.
Hang the wreath on a suitable hook or hanger that protects the door surface. Check that the attachment can support the weight and that the decoration will not obstruct the doorway. For outdoor use, consider local weather conditions because dampness can damage paper details and encourage mold on natural materials.
One of the best features of this project is that you can change its appearance without replacing the entire wreath. Remove the Halloween accents after the holiday and add different decorations for another season, or simply store the wreath in a dry box until next October.
By combining materials you already own with responsibly collected natural objects, you can create a distinctive entrance decoration that feels personal, attractive, and practical.
7. Eco Friendly Pumpkin Decorating Ideas Without Carving
Pumpkins are one of the most recognizable symbols of Halloween, but carving them is not the only way to create an attractive seasonal display. No carve pumpkin decorating offers a practical alternative because you can decorate whole pumpkins with removable materials and enjoy them as part of your autumn home décor.
Start by choosing pumpkins in different sizes, shapes, and colors. Orange pumpkins create a traditional Halloween appearance, while white, green, and muted yellow varieties can produce a more natural look. Before decorating, wipe the pumpkins with a clean, slightly damp cloth and allow them to dry.
Use fallen leaves, reusable fabric ribbons, or twine to add texture. You can arrange leaves around the stem, wrap twine loosely around the pumpkin, or create a simple display with several pumpkins grouped together on a wooden tray. If you want a spooky appearance, place handmade paper bats nearby or add removable facial features made from suitable craft materials.
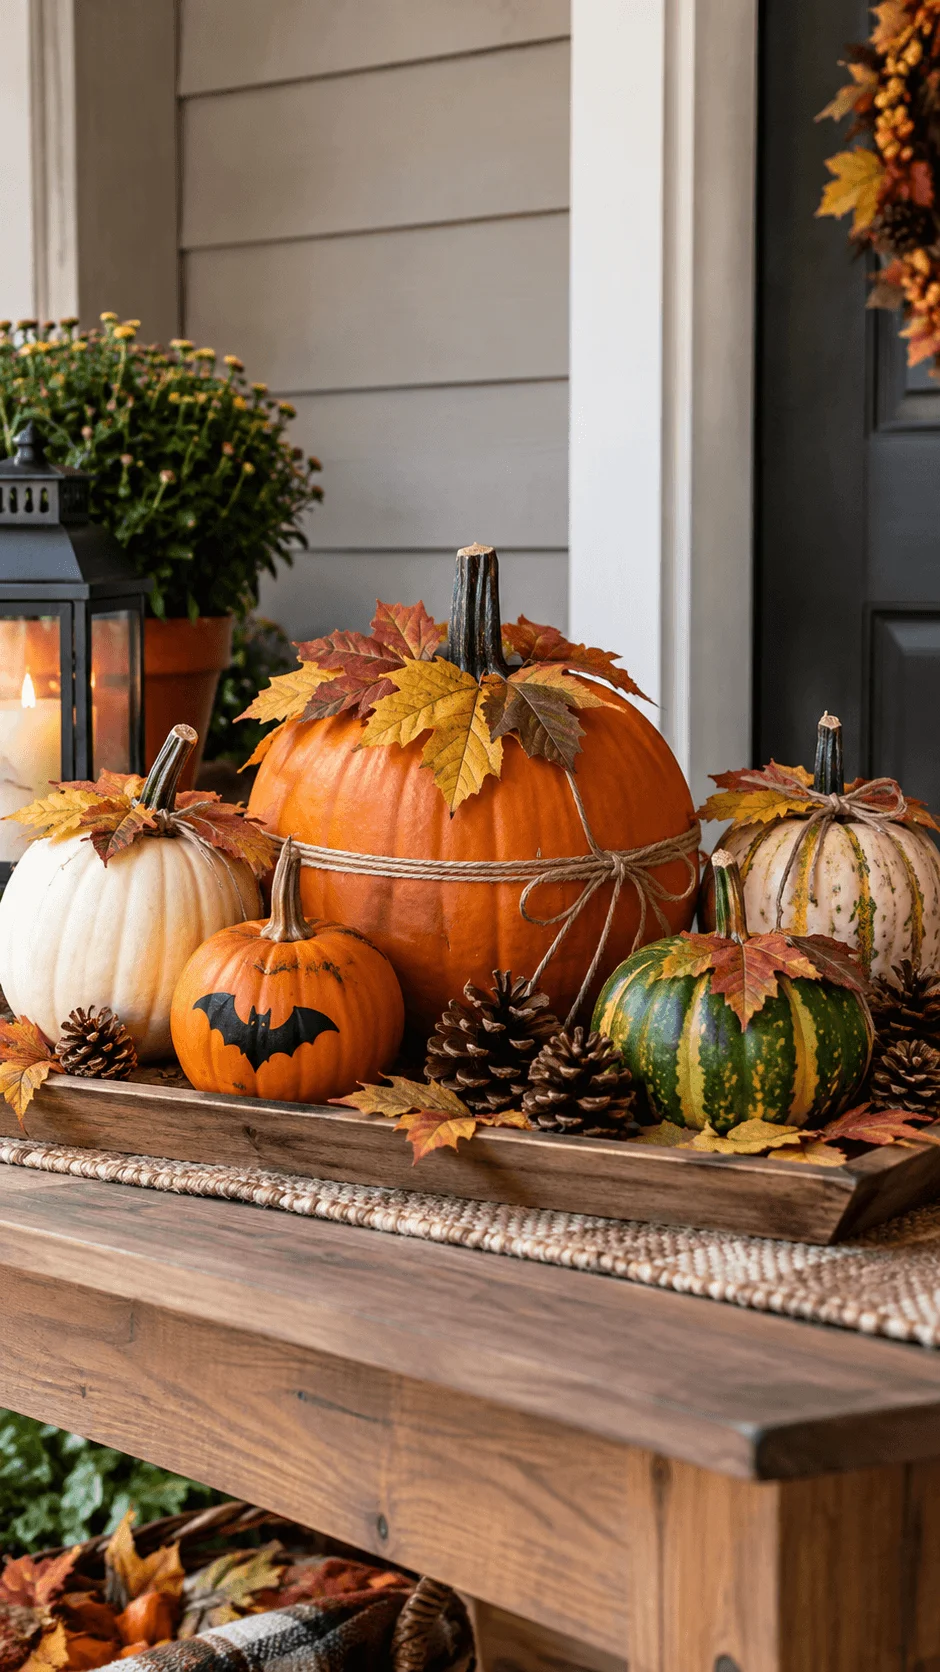
Think about the overall arrangement before decorating each pumpkin. A large pumpkin can serve as the centerpiece, while smaller pumpkins create visual balance around it. Place the display on an entryway table, fireplace mantel, dining table, or covered porch. You can also combine pumpkins with pinecones, fallen leaves, and existing glass jars for a cohesive autumn theme.
One advantage of this approach is that you can avoid buying disposable plastic pumpkin accessories. You also preserve the pumpkin’s outer surface, which may help it remain usable for longer than a carved pumpkin, although storage conditions and the pumpkin’s condition still affect its lifespan.
After Halloween, inspect the pumpkins before deciding what to do with them. If they remain fresh and suitable for food use, consider preparing an appropriate recipe. Otherwise, compost them where local facilities accept pumpkin waste. Remove ribbons, labels, and other decorative materials first.
These eco friendly Halloween ideas at home demonstrate that simple natural objects can create a beautiful seasonal display without complicated tools or expensive decorations.
8. DIY Cardboard Haunted House for Halloween
A miniature haunted village can become an eye catching centerpiece for your Halloween decorations. Instead of buying plastic buildings or disposable decorative houses, you can use old shipping boxes, cereal boxes, and other suitable cardboard packaging to create your own spooky neighborhood.
Begin by collecting cardboard pieces of different sizes. Flatten the boxes and sketch simple house shapes with pointed roofs, narrow windows, crooked doors, and uneven chimneys. You do not need advanced drawing skills. Slightly irregular shapes can make the village look more mysterious and imaginative.
Cut out the house outlines carefully using appropriate craft tools with adult supervision where necessary. Fold the cardboard into three dimensional structures and secure the edges with suitable tape or glue you already own. You can also make flat building silhouettes if you want a simpler design.
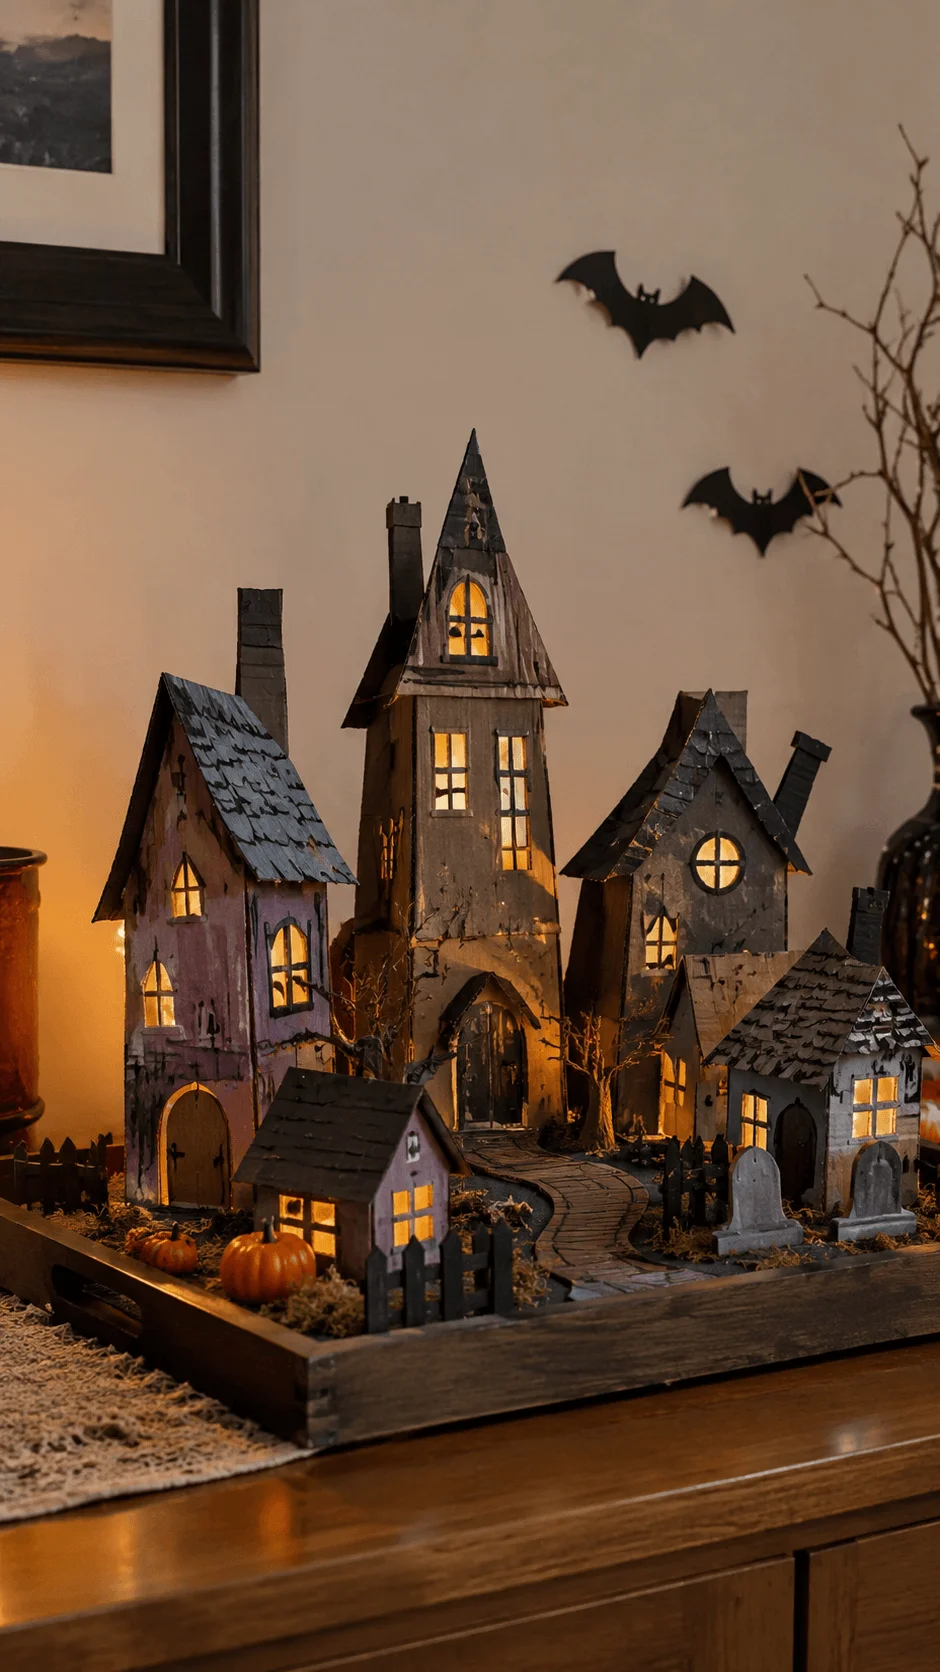
Once the structures hold their shape, decorate them with leftover paint or paper. Black, grey, brown, and muted purple create a traditional haunted appearance, while unpainted cardboard gives the village a rustic, handmade character. Draw tiny windows, roof tiles, wooden doors, and winding paths to add detail.
Arrange the buildings on a tray or a piece of sturdy cardboard. Place taller houses toward the back and smaller structures toward the front to create a sense of depth. Add cardboard tombstones, paper bats, or small twigs to complete the scene. If you already own battery powered LED lights, you can place suitable lights nearby to create a gentle evening glow.
This project works particularly well on a bookshelf, mantel, console table, or dining room centerpiece. You can create a compact village for a small apartment or a larger scene if you have more space.
Cardboard is lightweight and easy to store, but moisture can weaken it. Keep the village in a dry location and pack it carefully after Halloween. Store the buildings in a box so you can reuse them next year, adding new details instead of rebuilding everything.
By transforming ordinary packaging into a decorative village, you can create a personalized Halloween scene while making better use of materials that might otherwise go unused.
9. Reusable Fabric Halloween Bunting
Fabric bunting is an attractive way to decorate a room without relying on disposable paper banners. You can make it from old shirts, worn pillowcases, leftover sewing materials, or fabric scraps that no longer serve their original purpose.
Begin by choosing fabrics that complement your existing decorations. Black, orange, cream, brown, and deep purple work well for Halloween, but you can use other colors to match your home’s interior. Mixing different patterns and textures can make the finished display more interesting.
Cut the fabric into triangles, rectangles, or simple decorative shapes. You can also create small pumpkins, ghosts, moons, or bats from fabric scraps. If you enjoy sewing, stitch the edges for a neat finish. Alternatively, use a suitable no sew method that keeps the fabric securely attached.
Attach each piece to a length of reusable ribbon, cord, or fabric tape. Leave enough space between the shapes so the bunting hangs naturally. Before securing the pieces permanently, arrange them on the floor to check the order and balance of the colors.
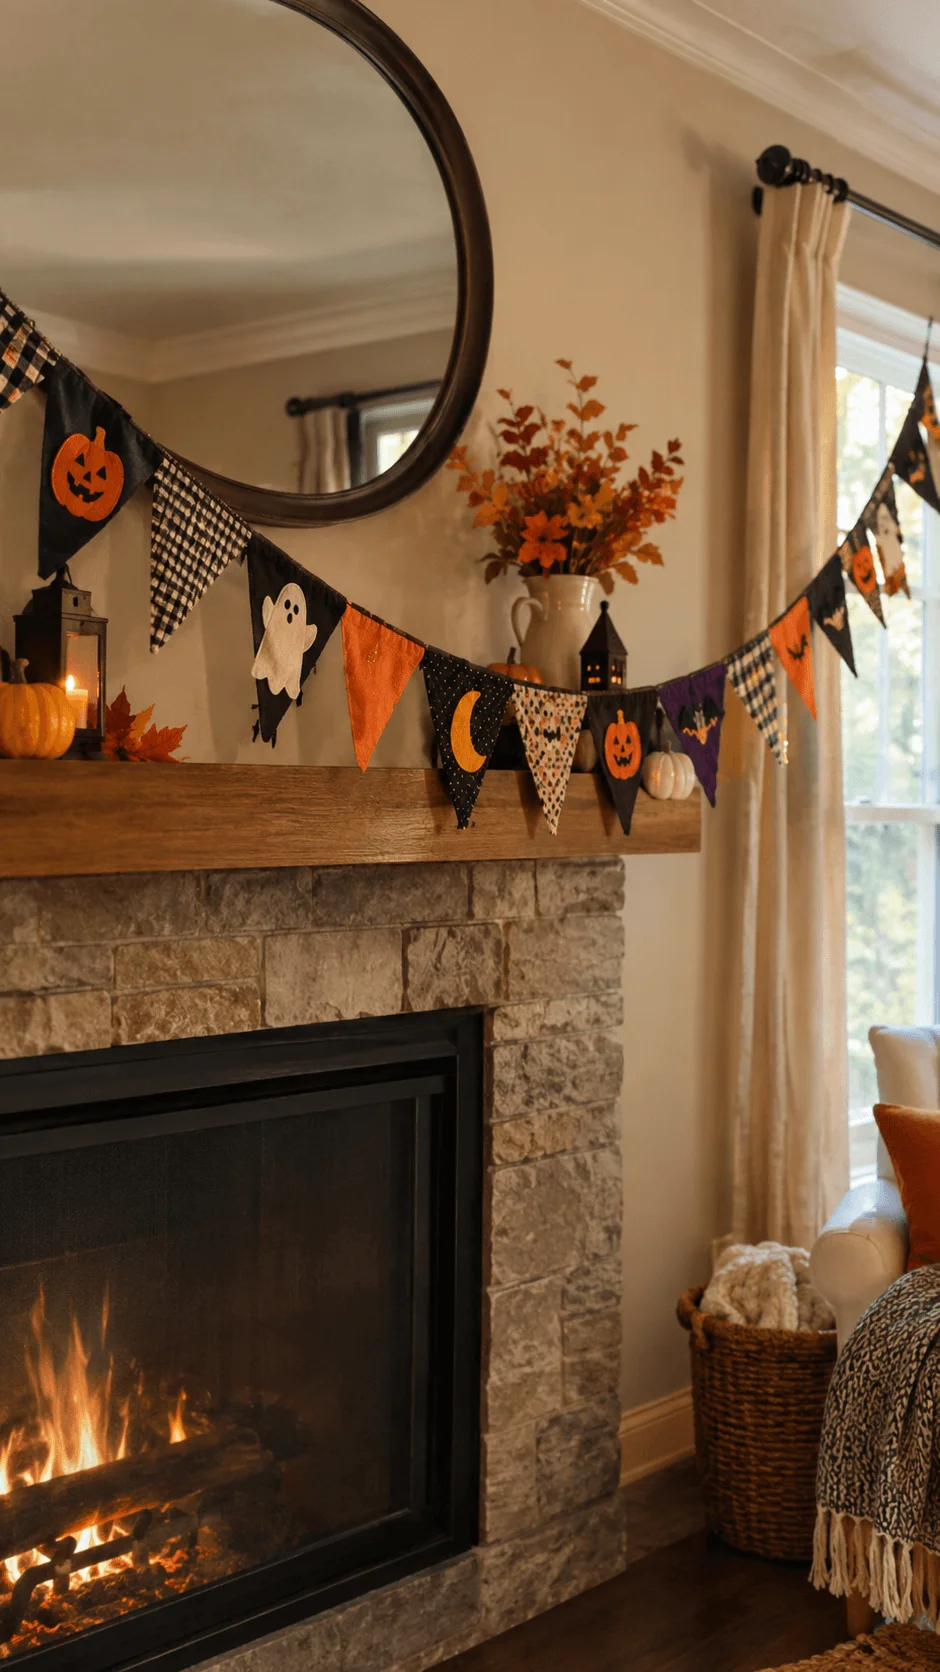
Hang the finished bunting above a fireplace, across a window, around a doorway, or along a wall behind a party table. For a minimalist interior, use simple shapes in two or three coordinated colors. For a more playful appearance, combine different fabrics and decorative patterns.
Fabric bunting also gives you room to experiment. You can create one side with Halloween designs and another with general autumn patterns, provided the construction allows you to display either side. This makes the decoration useful beyond a single holiday.
When Halloween ends, remove the bunting carefully, clean it according to the fabric’s requirements, and fold it for storage. If you make durable pieces and handle them properly, you can reuse them for many seasons.
Choosing fabric you already own can reduce the need for new supplies and gives old textiles another purpose. It also allows you to create decorations that match your personal style instead of purchasing mass produced banners.
10. Miniature Haunted Terrarium Using Reused Glass
A miniature haunted terrarium brings a small spooky landscape into your home. It combines the visual appeal of a tiny model with the creative possibilities of recycled containers, making it suitable for desks, bookshelves, side tables, and other small spaces.
Look for a clean glass jar, wide mouthed container, or transparent vessel that you already own. Wash it thoroughly and dry it completely before adding decorations. A wide opening usually makes arranging the miniature scene easier.
Create a simple haunted house from cardboard. Cut out the walls, roof, windows, and door, then assemble the pieces into a small structure that fits inside the container. Keep the proportions appropriate to the vessel so the house remains visible without overwhelming the rest of the scene.
Next, arrange small stones, suitable dry twigs, and other clean natural materials around the house. You can create a winding path using small pebbles or add paper bats above the building. A piece of cardboard beneath the scene can serve as a base, while small scraps of brown paper can suggest an uneven landscape.
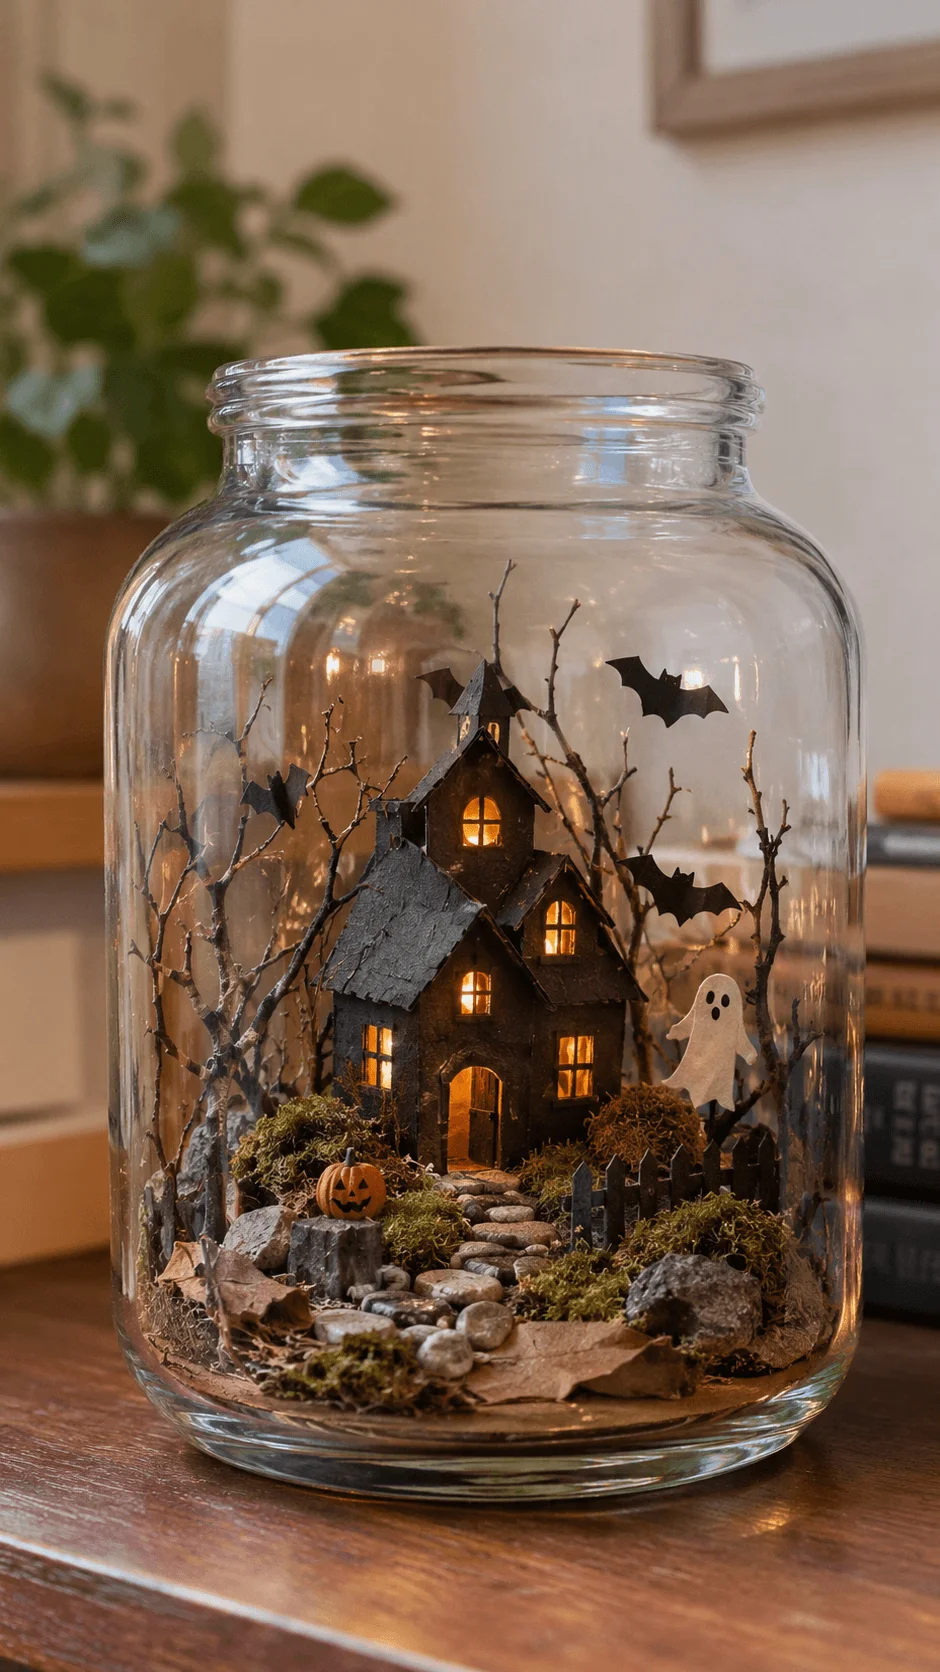
Think about depth when arranging the elements. Place the largest object slightly behind the center and use smaller objects toward the front. This arrangement helps the miniature landscape look more natural and makes each detail easier to see.
For a witchy appearance, use dark paper, muted colors, and a few existing decorative accessories. If you prefer a woodland theme, retain the natural colors of the twigs and stones. You can also create a family friendly version with cheerful ghosts and a friendly haunted house.
Keep the terrarium dry if you use cardboard and other materials that could deteriorate in moisture. Do not add water to a decorative arrangement unless you have designed it specifically for that purpose. Place the container on a stable surface where it cannot easily fall.
After Halloween, remove the seasonal figures and reuse the glass container for another craft or an appropriate household purpose. Store the miniature house and other durable elements together so you can recreate the scene next year.
11. Thrifted Basket Spider Display
A woven basket can become an unusual Halloween decoration when you use its rounded shape as the body of a giant spider. This project combines upcycling with playful design and works particularly well for people who want something different from conventional paper bats and fabric ghosts.
Begin by looking for an old basket in your home, storage area, or existing collection of household items. If you do not have one, consider whether a suitable secondhand basket is available before purchasing a new decoration. Choose a basket that holds its shape and has no loose or dangerous pieces.
Place the basket upside down or position it in whichever direction creates the most convincing spider body. Use strips of old fabric, suitable cardboard, or other existing craft materials to create the legs. Attach the legs securely using an appropriate method that does not damage the basket unnecessarily.
For a more realistic spider, make eight legs and arrange them around the body. Bend flexible fabric strips or shape cardboard pieces to create a slight curve. If you prefer a cartoon style, use shorter legs and larger decorative eyes made from suitable reused materials.
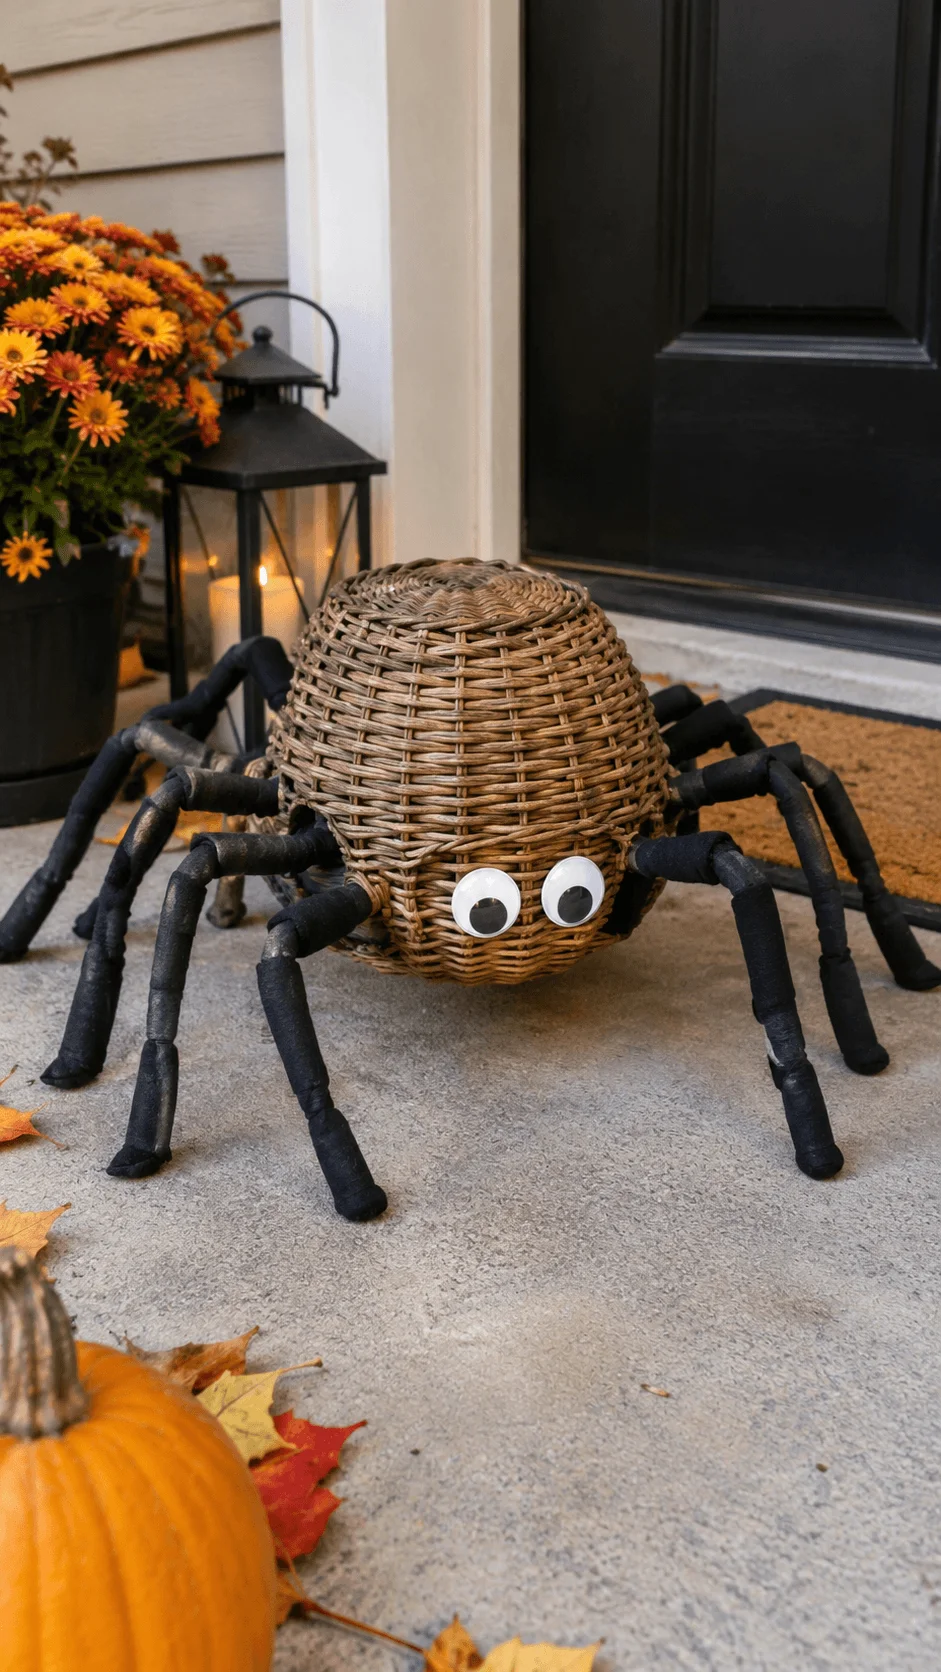
You can keep the basket in its natural color for a rustic Halloween display or use leftover paint if the material can safely accept it. A black or dark brown finish creates a more traditional spider appearance, while a natural woven texture gives the decoration a distinctive handmade look.
Place the spider near an entryway, on a stable shelf, or beside a collection of cardboard haunted houses. For a larger display, position it near a paper bat wall or a natural wreath. Make sure the legs do not block a walkway or create a tripping hazard.
This project also works well in covered outdoor areas when the materials can tolerate the local weather. Protect fabric and cardboard details from rain, and bring the decoration indoors when necessary.
After Halloween, detach any temporary details and store the basket with the legs folded or arranged safely. You can reuse the basket for ordinary storage when you no longer need the spider decoration. This makes the project particularly useful because its main component retains a practical purpose throughout the year.
12. Reusable Moon and Star Window Decorations
A moon and star window display creates a magical Halloween atmosphere without requiring complicated materials. It works especially well if you want decorations that look attractive during the day and create interesting silhouettes after dark.
Begin with leftover paper, old folders, or suitable cardboard packaging. Draw moons, stars, small bats, and other celestial shapes in different sizes. Cut them out carefully and arrange them on a flat surface before attaching anything to the window.
For a simple design, use black paper against a bright window. If you prefer a softer appearance, choose cream or brown paper and combine it with natural autumn colors. You can also create a layered arrangement with a large moon surrounded by smaller stars and flying bats.
Think about how the display will look from inside and outside. Place the largest shapes near the center or along one edge, then use smaller shapes to guide the viewer’s eye across the window. Avoid covering areas where people need a clear view, particularly near doors and ground level windows.
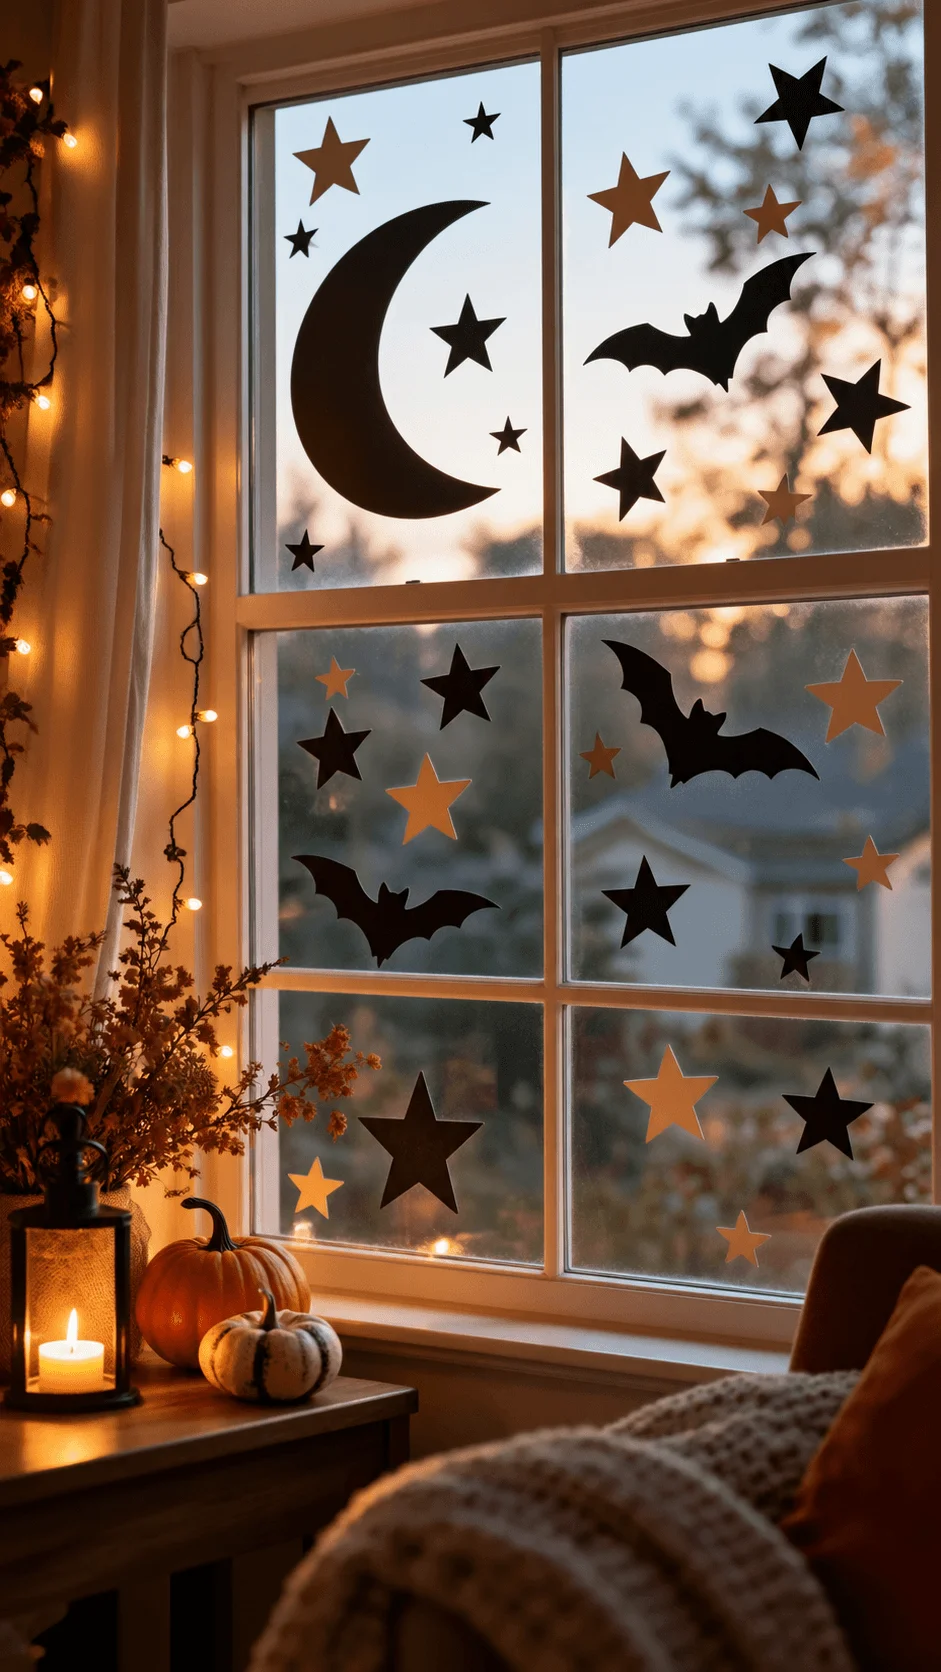
Attach the decorations using suitable removable materials that will not damage the glass or leave difficult residue. Test the attachment method first, especially if the window has a special coating or delicate finish.
If you already own energy efficient LED string lights, you can arrange them nearby to create a warm evening atmosphere. Keep electrical connections away from moisture and follow the manufacturer’s instructions. Do not buy additional lighting solely for this project if existing lighting already meets your needs.
This display suits bedrooms, living rooms, entryways, and other areas where a seasonal touch would be welcome. You can make the arrangement spooky with bats and dark silhouettes or keep it elegant with moons, stars, and muted colors.
After Halloween, remove the decorations carefully and store the paper shapes flat. Because the design uses simple materials, you can rearrange the same pieces next year or adapt them for another seasonal display.
How to Make Halloween Decorating More Sustainable
Sustainable decorating starts with thoughtful choices before you begin a project. Check your existing decorations and craft supplies first. You may already have ribbons, containers, fabric, lights, and ornaments that can support a completely new theme.
When you need materials, look for items that you can reuse or repurpose. Recycled cardboard, old textiles, and suitable household containers often provide more creative opportunities than disposable craft products. Avoid unnecessary purchases, particularly decorations that serve only one brief occasion.
Consider durability as well. Paper decorations work well indoors when you keep them dry, while sturdy fabric ornaments can last for years with appropriate care. Choose materials according to where you plan to display them and how often you expect to reuse them.
Lighting also deserves attention. Use existing LED lights when possible, turn them off when they are not needed, and keep them away from flammable materials. Choose safe, stable arrangements rather than adding unnecessary lighting to every corner.
Finally, plan for cleanup. Separate reusable decorations from recyclable materials and ordinary waste. Compost suitable untreated natural materials where local facilities accept them, and remove plastic attachments, adhesives, and other unsuitable components before disposal.
Budget Friendly Tips for Sustainable Halloween Decor
You do not need a large budget to create a beautiful Halloween home. Start by choosing one or two focal points, such as the entrance, living room mantel, or main window. A coordinated display in these areas often creates more visual impact than spreading unrelated decorations throughout the entire house.
Choose a simple color palette before starting your projects. Black, orange, cream, and brown create a traditional look, while muted green, purple, and natural wood can produce a more mysterious atmosphere. Repeating a few colors across different decorations helps the entire home feel coordinated.
Reuse supplies across several projects. The same cardboard can provide bats, haunted houses, and window shapes, while old fabric can become ghost garlands, bunting, or spider legs. Save suitable scraps rather than throwing them away immediately.
You can also reduce costs by making decorations gradually. Complete one project, see how it looks in your space, and decide whether another decoration is necessary. This prevents unnecessary spending and encourages more thoughtful design.
Styling Ideas for Different Home Aesthetics
If you enjoy rustic interiors, combine natural leaf garlands, twig wreaths, pinecones, and cardboard decorations. Keep the materials close to their original colors and use simple arrangements that highlight natural textures.
For a witchy look, create an apothecary shelf with reused glass jars, handwritten labels, dark fabrics, and existing books. Add a few paper bats or a miniature haunted terrarium to create a mysterious atmosphere without filling every surface with decorations.
Minimalist homes benefit from restraint. Choose a paper bat wall, a simple moon and star window display, or a small group of carefully arranged pumpkins. A limited color palette helps the decorations complement the rest of the room.
For a family friendly style, use fabric ghosts, cheerful cardboard houses, colorful paper shapes, and playful basket spiders. Invite children to help with age appropriate tasks such as drawing patterns, choosing colors, or arranging finished decorations.
The most successful display reflects your personal taste and the space available. You do not need to follow every trend or complete all twelve projects. Choose a few ideas that work well together and make the most of the materials you already own.
Conclusion
Creating eco friendly Halloween ideas at home allows you to celebrate the season with creativity, personal style, and thoughtful material choices. From recycled paper bats and fabric ghosts to natural wreaths, cardboard haunted villages, and miniature terrariums, simple household materials can become memorable decorations.
The key is to begin with what you already have, choose projects that suit your home, and prioritize decorations that you can store and reuse. Small decisions, such as repurposing old clothing, avoiding unnecessary plastic accessories, and composting suitable pumpkin waste, can help reduce waste without taking away from the enjoyment of Halloween.
You do not need expensive supplies or complicated crafting skills to create an inviting seasonal atmosphere. Start with two or three favorite projects, personalize them to match your home, and build your collection gradually over time.
With a little imagination and careful planning, you can create a Halloween display that looks beautiful, fits your budget, and makes better use of the materials around you.