DIY Christmas Crafts for Kids Using Recycled Materials
Christmas crafting becomes more meaningful when children discover that a cereal box, paper tube, or leftover piece of wrapping paper can turn into something festive. DIY Christmas Crafts for Kids Using Recycled Materials make it possible to decorate your home, create handmade gifts, and spend quality time together without relying on an expensive shopping trip.
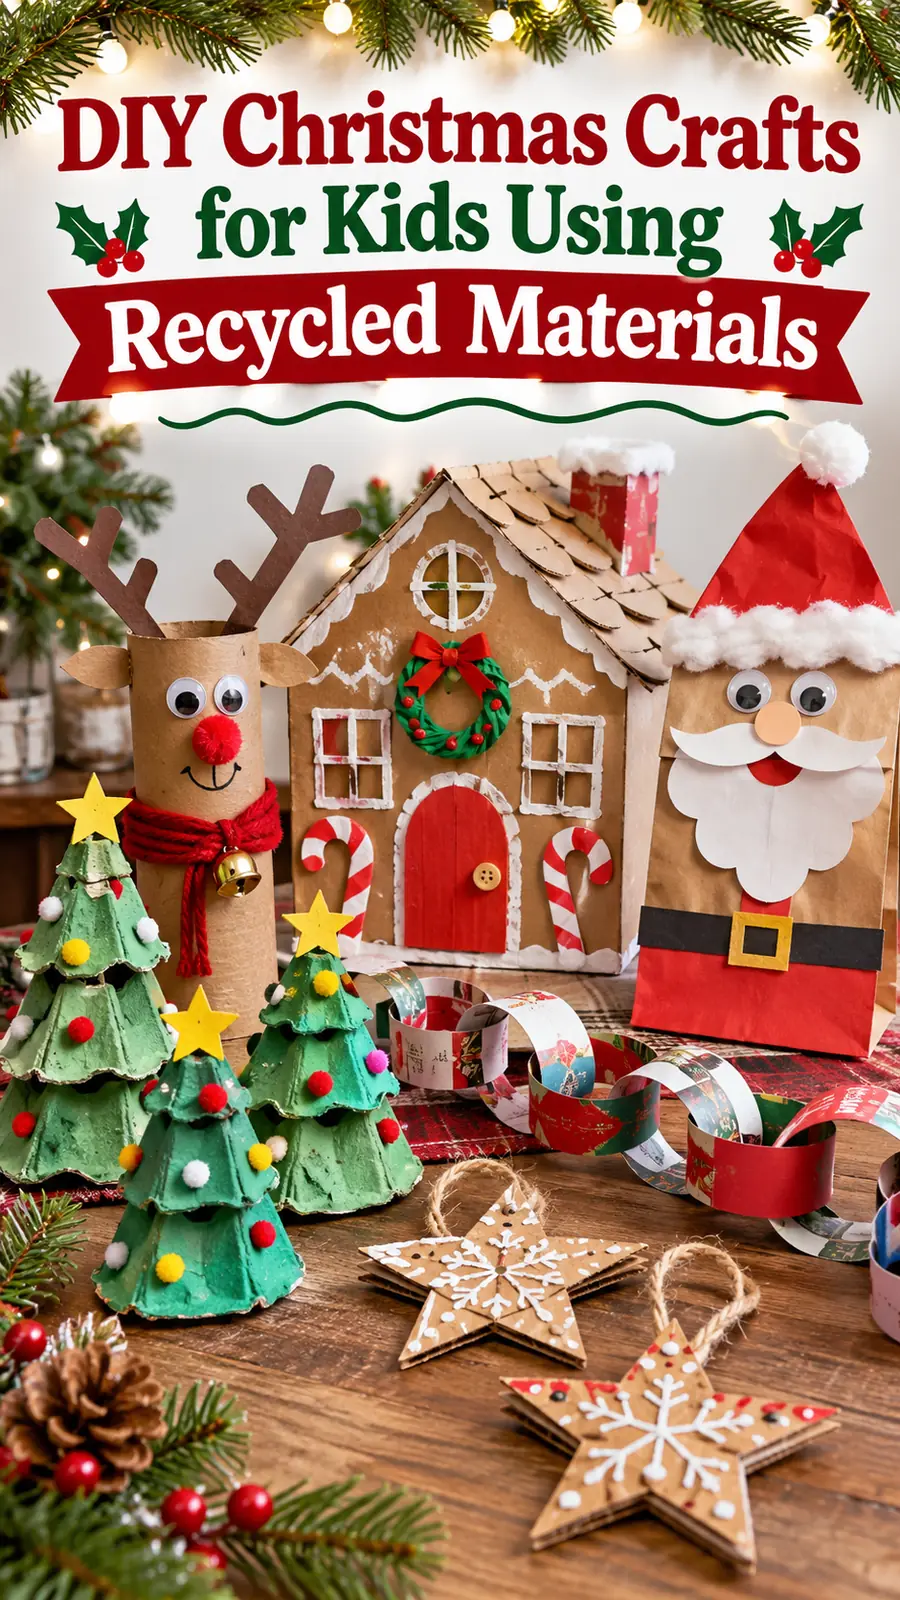
These 12 creative projects range from simple garlands for little hands to miniature villages for older children. Each idea uses familiar household scraps, offers room for personal touches, and includes practical tips for making the result last. Gather a few clean materials, clear the table, and let your children choose what they want to make.
Cardboard Tube Reindeer With Paper Antlers
A plain cardboard tube can become a cheerful reindeer that stands on a shelf or joins a handmade Christmas village. Save clean paper towel tubes and cut them into shorter sections. Brown scrap paper, leftover yarn, and a small piece of packaging cardboard provide almost everything else you need.
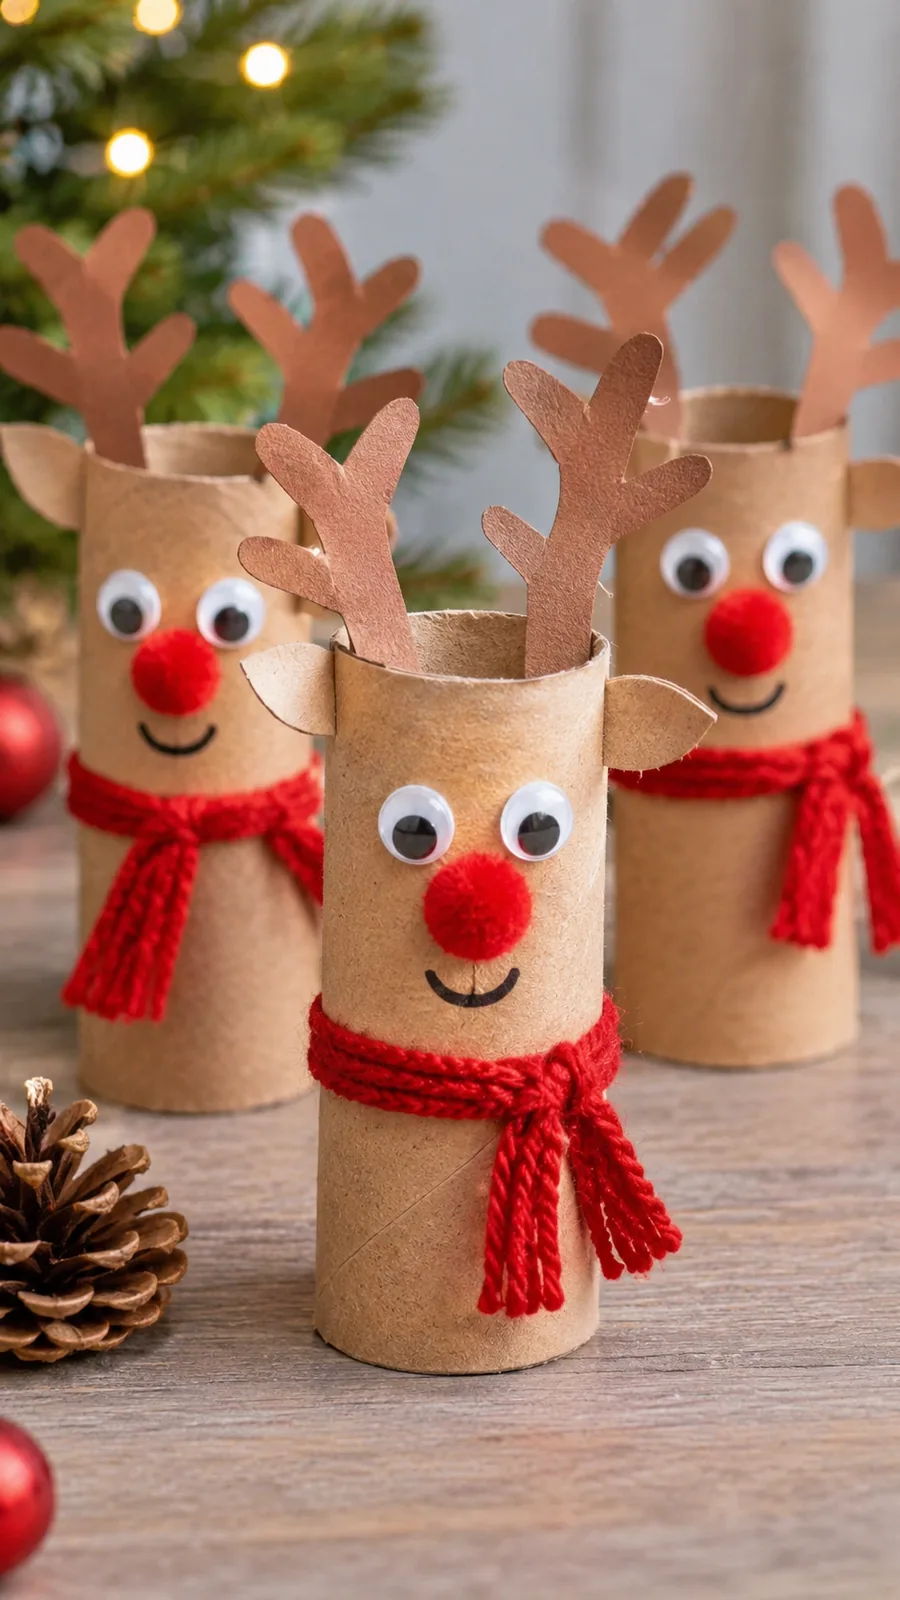
Wrap the tube in brown paper or paint it with washable brown paint. Draw antlers onto the back of a cereal box, then have an adult cut them out for younger children. Attach them inside the top of the tube with paper tape. Add a drawn nose and eyes, or use small circles cut from colored magazines. Children can glue a red paper nose onto one reindeer and a black nose onto another.
Try making a family of reindeer with different expressions. Slip a name card inside each tube to turn them into holiday table decorations. Keep loose buttons and tiny decorations away from children who still put objects in their mouths. These lightweight figures store easily for next Christmas.
Egg Carton Christmas Trees With Stacked Layers
Cardboard egg cartons have naturally shaped cups that make miniature Christmas trees look surprisingly dimensional. Choose a clean, dry paper carton with no visible food residue. An adult can separate several cups before the activity begins, making it easier for younger makers to concentrate on painting and decorating.
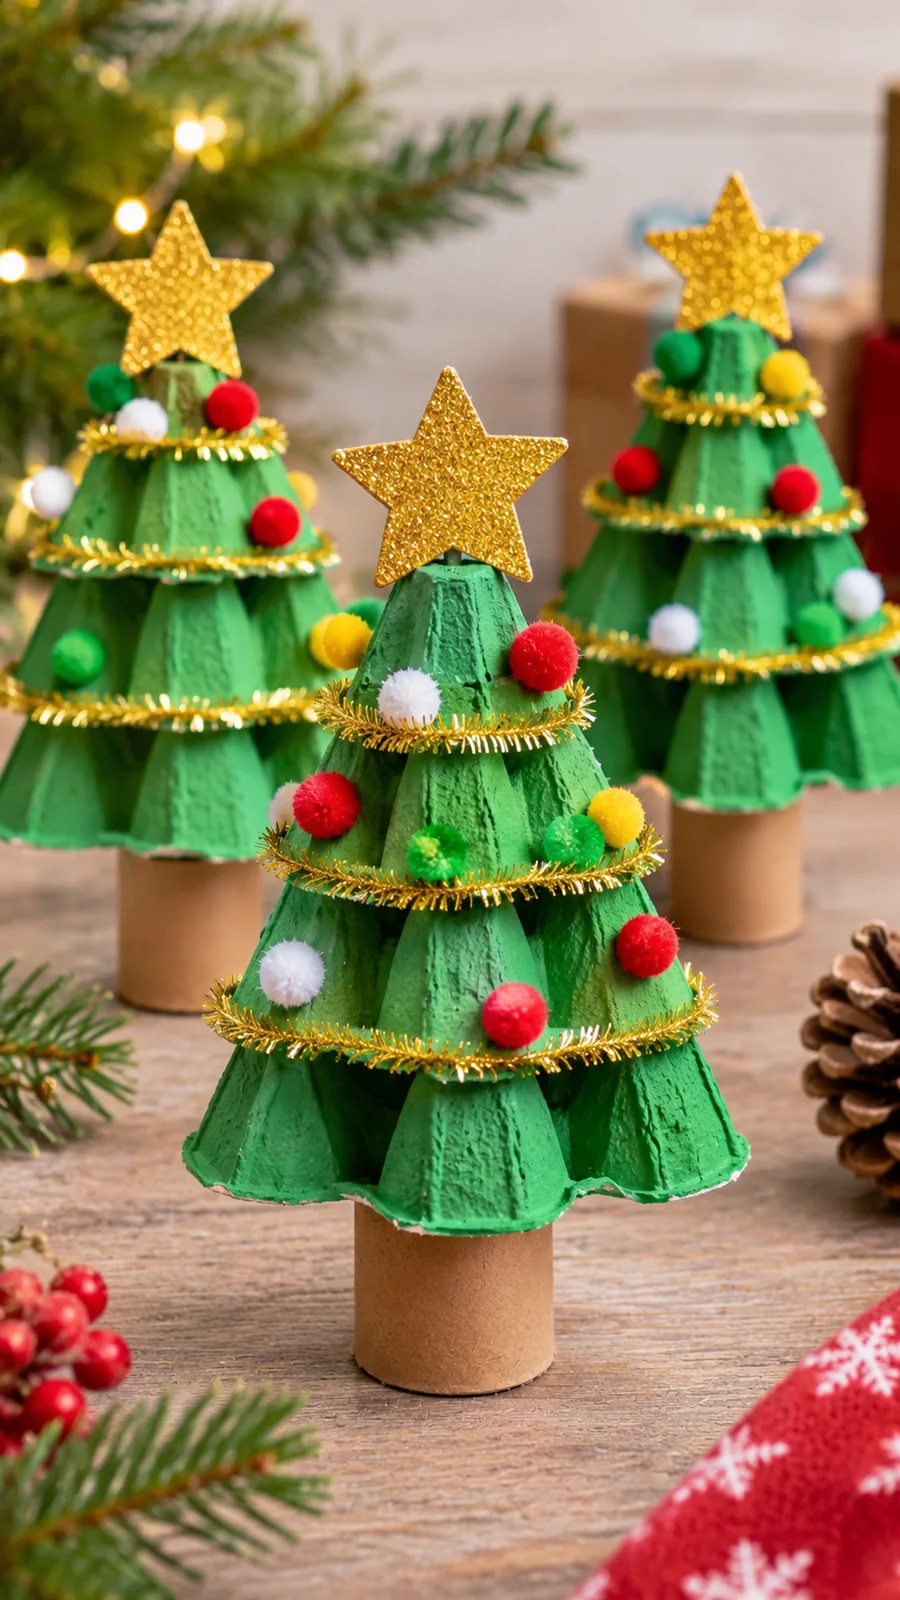
Paint three cups green and let them dry completely. Stack them upside down, largest looking layer at the bottom, and secure them with craft glue. A small folded cardboard square makes a sturdy base. Children can decorate the branches with dots of leftover paint or tiny scraps of wrapping paper. A paper star cut from a cereal box completes the top.
These trees work as mantel decorations, classroom displays, or homemade gifts. For a forest scene, vary the number of layers and use different shades of green. Choose fresh craft materials instead of previously used egg cartons when hygiene is a concern, particularly in preschool settings.
Cereal Box Gingerbread Houses Without Baking
Empty cereal boxes offer a simple way to build a gingerbread house without baking, candy, or expensive craft kits. The thin cardboard is easier to fold than shipping boxes, so school age children can help design doors, windows, and roof shapes. The finished houses make a charming display along a windowsill.

Open a clean cereal box along its glued seam, turn the printed side inward, and refold it into a smaller house shape. Have an adult trim roof pieces and create any openings. Cover the outside with brown paper saved from parcels. Use white paper strips for icing patterns, red magazine clippings for pretend candy, and leftover gift wrap for colorful shutters. Glue the roof securely before adding details.
Group the houses on a reused cardboard tray to create a festive village.
Old Magazine Paper Chain Garland
A paper chain is one of the easiest recycled Christmas crafts for kids, and colorful magazines make it far more interesting than a garland made from plain construction paper. This project suits groups because everyone can contribute a few links, and the chain can grow across a doorway or classroom wall.

Choose pages in red, green, gold, or any color that complements your decorations. Cut the paper into strips of similar width. Make one strip into a loop with a glue stick, then thread the next strip through it before sealing. Continue until the garland reaches the length you want. Young children can select colors and connect prepared strips while older children handle cutting and pattern planning.
Alternate solid colors with illustrated pages to create movement and texture. Save the chain in a roomy box rather than crushing it after Christmas. If it tears, replace only the damaged links. Hang the garland away from candles, heaters, and other hot surfaces.
Recycled Cardboard Star Ornaments
Packaging cardboard makes sturdy star ornaments that children can personalize year after year. Choose the smooth panels of an old delivery box or the back of a cereal packet. Each star offers a small canvas for drawing, painting, collage, and practicing careful hand movements.
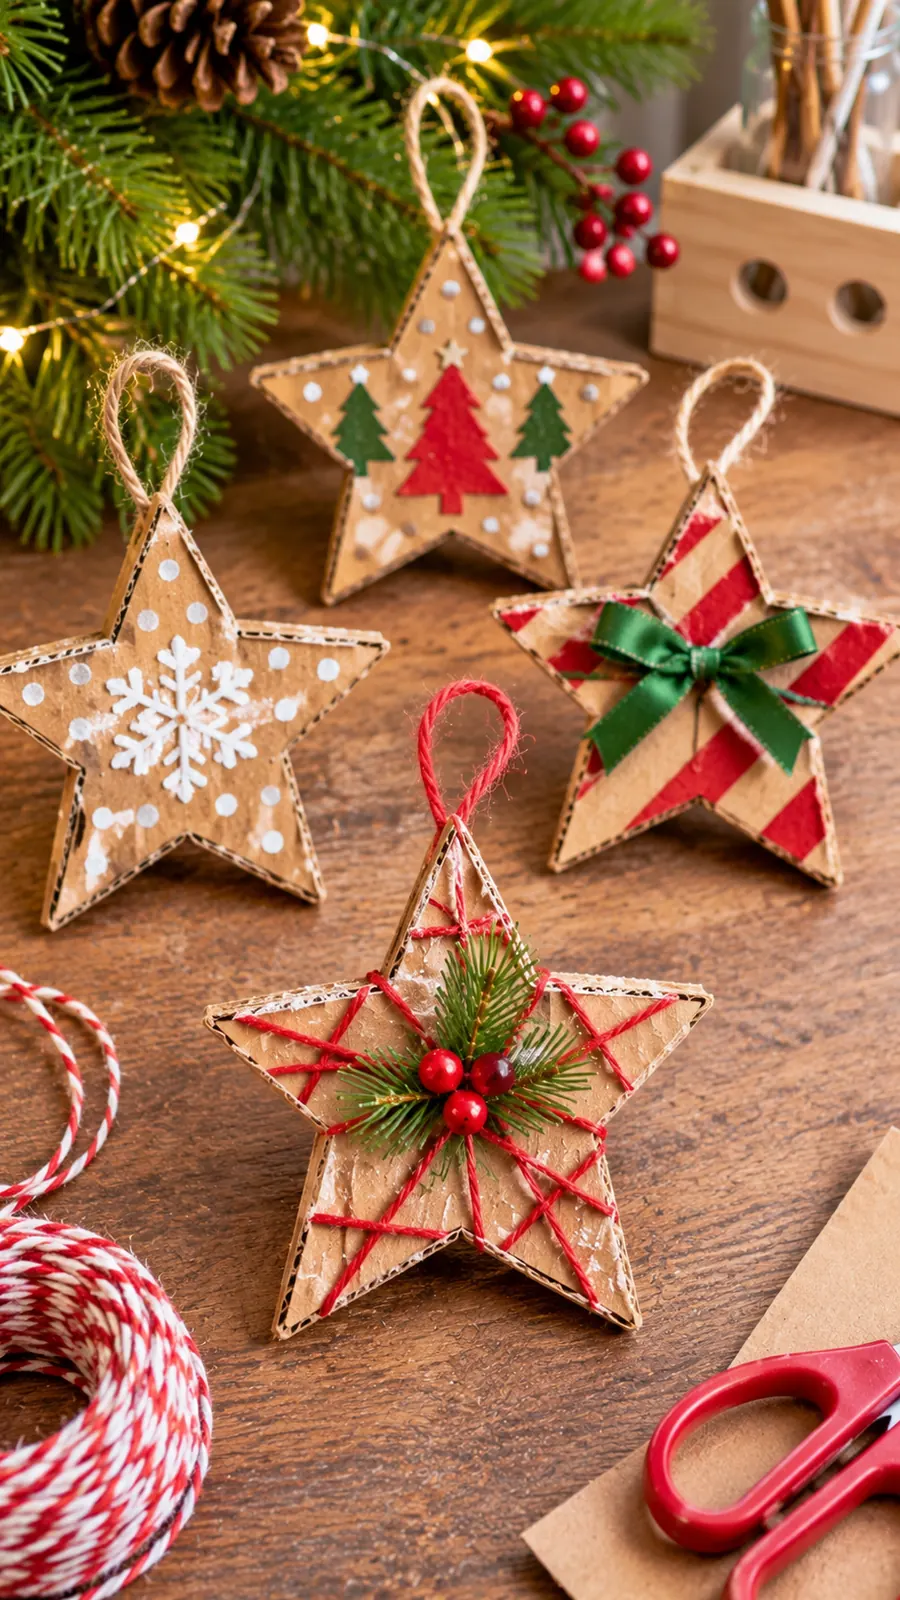
Trace a star shape with a cookie cutter or a paper template. An adult should cut thick cardboard, while older children can cut lightweight cereal box card with suitable scissors. Cover one side with reused wrapping paper or paint it in a festive color. Add dots, stripes, or a handwritten holiday message. Punch a hanging hole near the top with adult help and thread through a short piece of saved ribbon.
Create sets of stars in different sizes or let children write the year on the reverse. These ornaments also make thoughtful gift toppers that the recipient can hang on a tree. Avoid making the hanging hole too close to the edge, since the cardboard may tear.
Paper Bag Santa Gift Puppets
Clean brown paper bags can become playful Santa puppets, giving children a craft they can use for storytelling after the glue dries. This works particularly well for a family afternoon or a classroom activity because each puppet can have its own expression and personality.
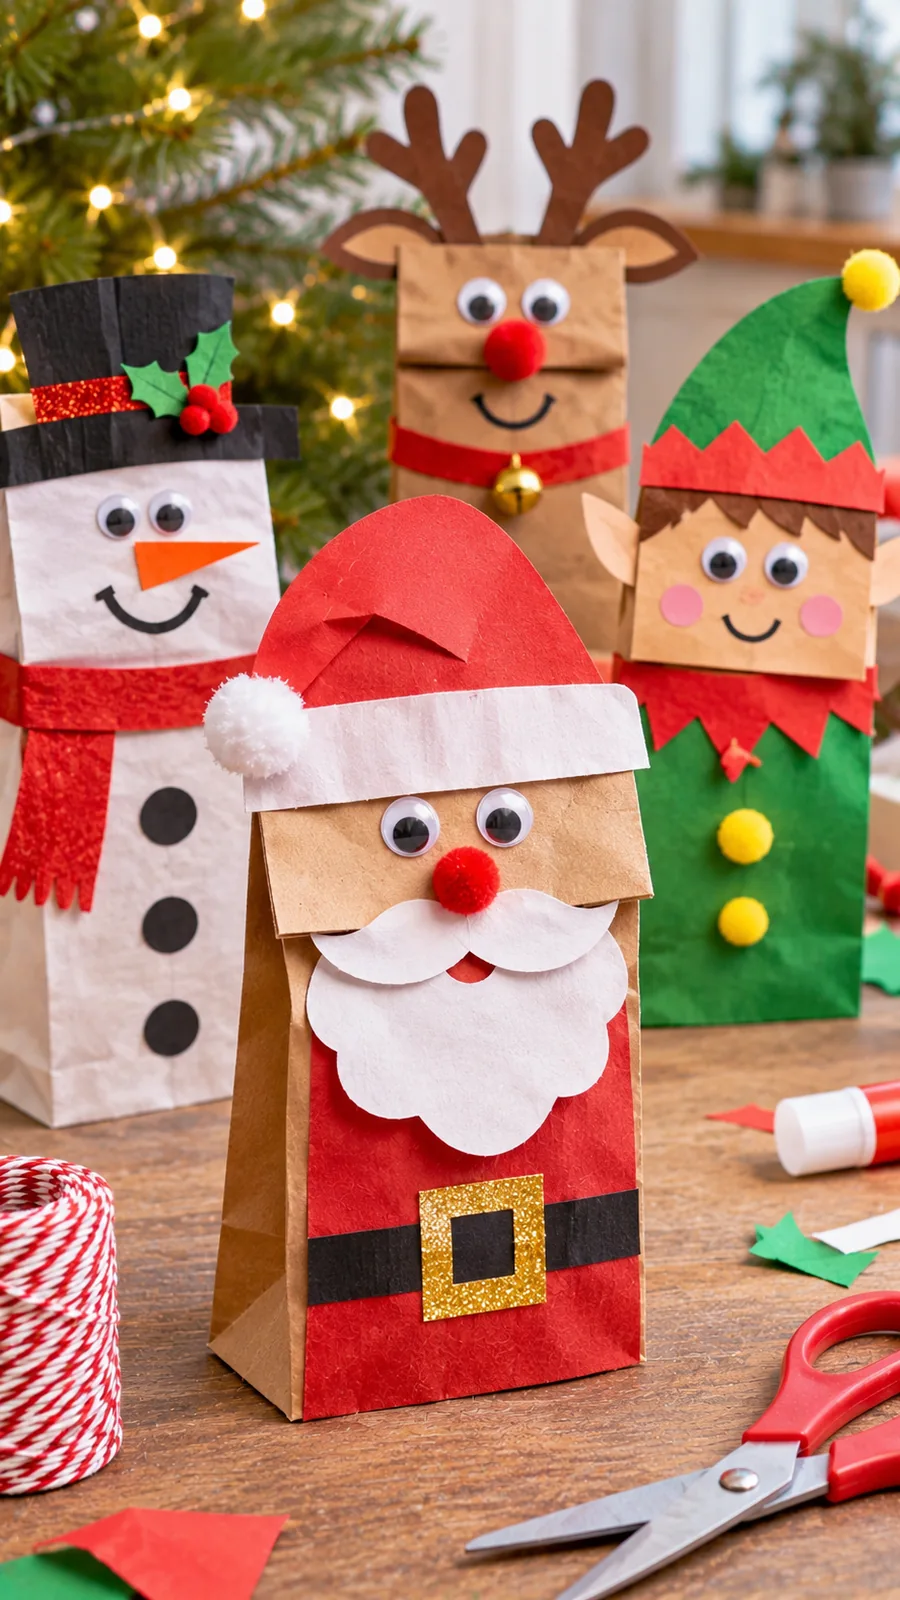
Place the bag with its folded bottom facing up; that flap becomes the puppet’s face. Make a red hat from reused wrapping paper and a white beard from small torn pieces of unwanted office paper. Add eyes and a nose with markers. Glue the decorations in place without sealing the opening where the hand goes. Once dry, children can slip a hand inside and make their Santa character speak.
Create a puppet theater from an empty cardboard box and perform holiday stories.
Scrap Fabric Christmas Stocking Collages
Old clothing, worn pillowcases, and leftover fabric pieces can become cozy looking Christmas stocking art. Instead of asking children to sew, turn the project into a flat collage that suits a wide range of ages and avoids the need for needles.
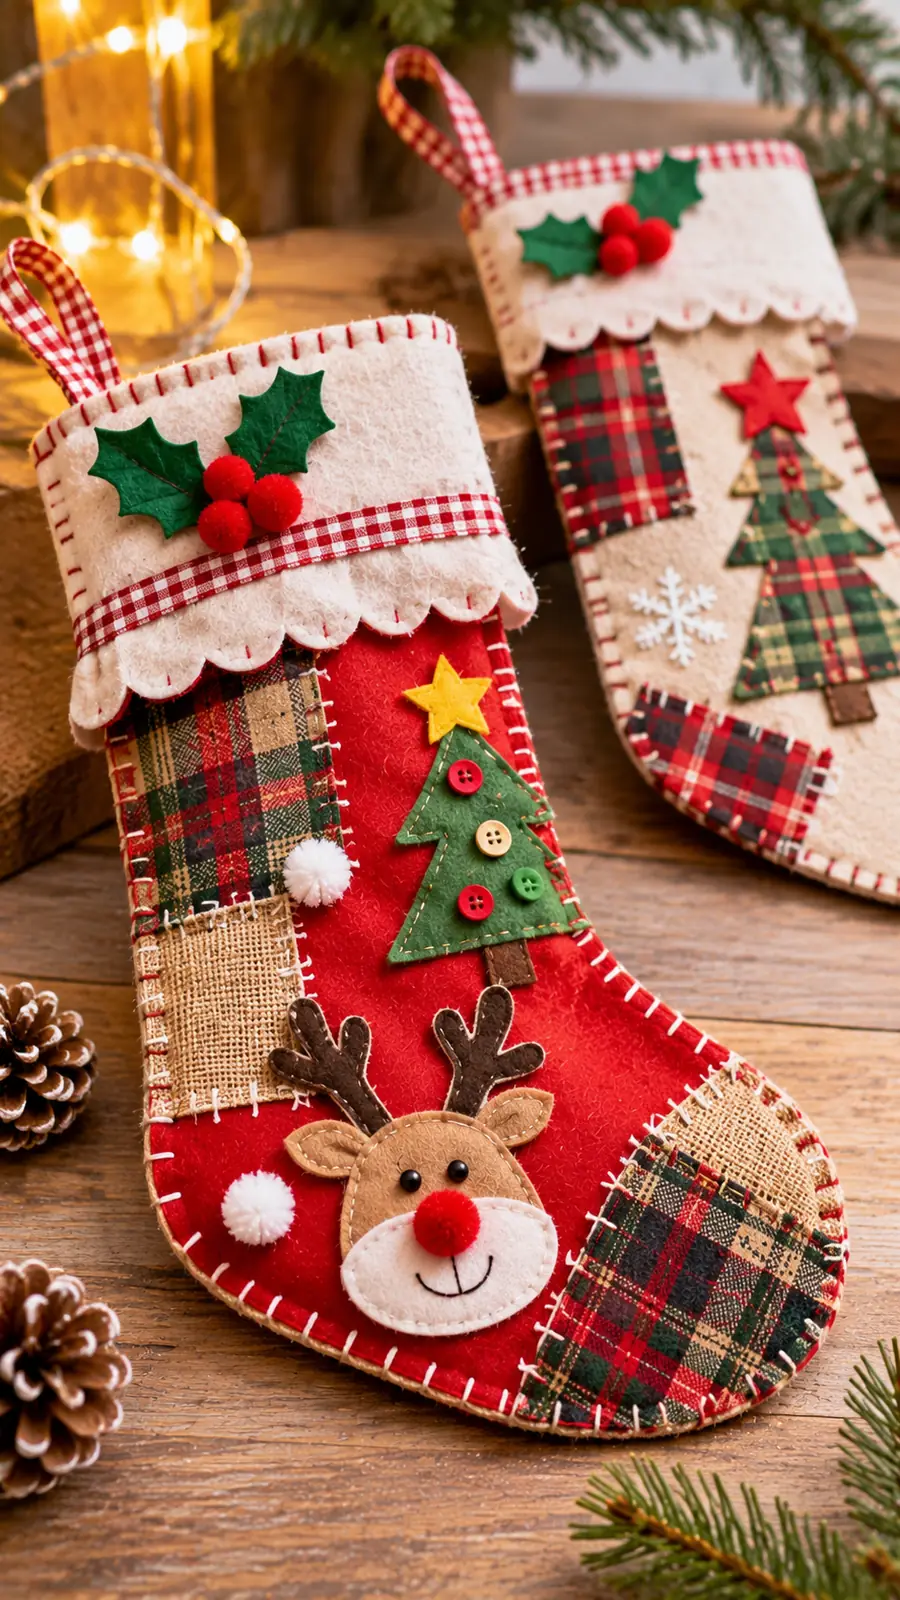
Draw a large stocking outline on a cereal box panel and cut it out. Provide clean fabric scraps in manageable sizes, along with craft glue. Children can cover the stocking in stripes, patchwork squares, or bright shapes. A narrow fabric strip makes a cuff, and a short loop of old ribbon can become a hanger. Allow extra drying time because fabric absorbs more glue than paper.
Try combining denim, plaid, cotton, and sweater textures for a handmade look. Write a family member’s name on a small paper label to personalize the design. The result can decorate a bedroom door or become a keepsake tucked into the holiday box.
Newspaper Snowflakes for Winter Windows
Newspaper offers a beautiful alternative to fresh paper for making folded snowflakes. The printed words and pictures create a delicate pattern that looks especially attractive when light shines through. This quiet activity also helps children explore symmetry while preparing for Christmas.
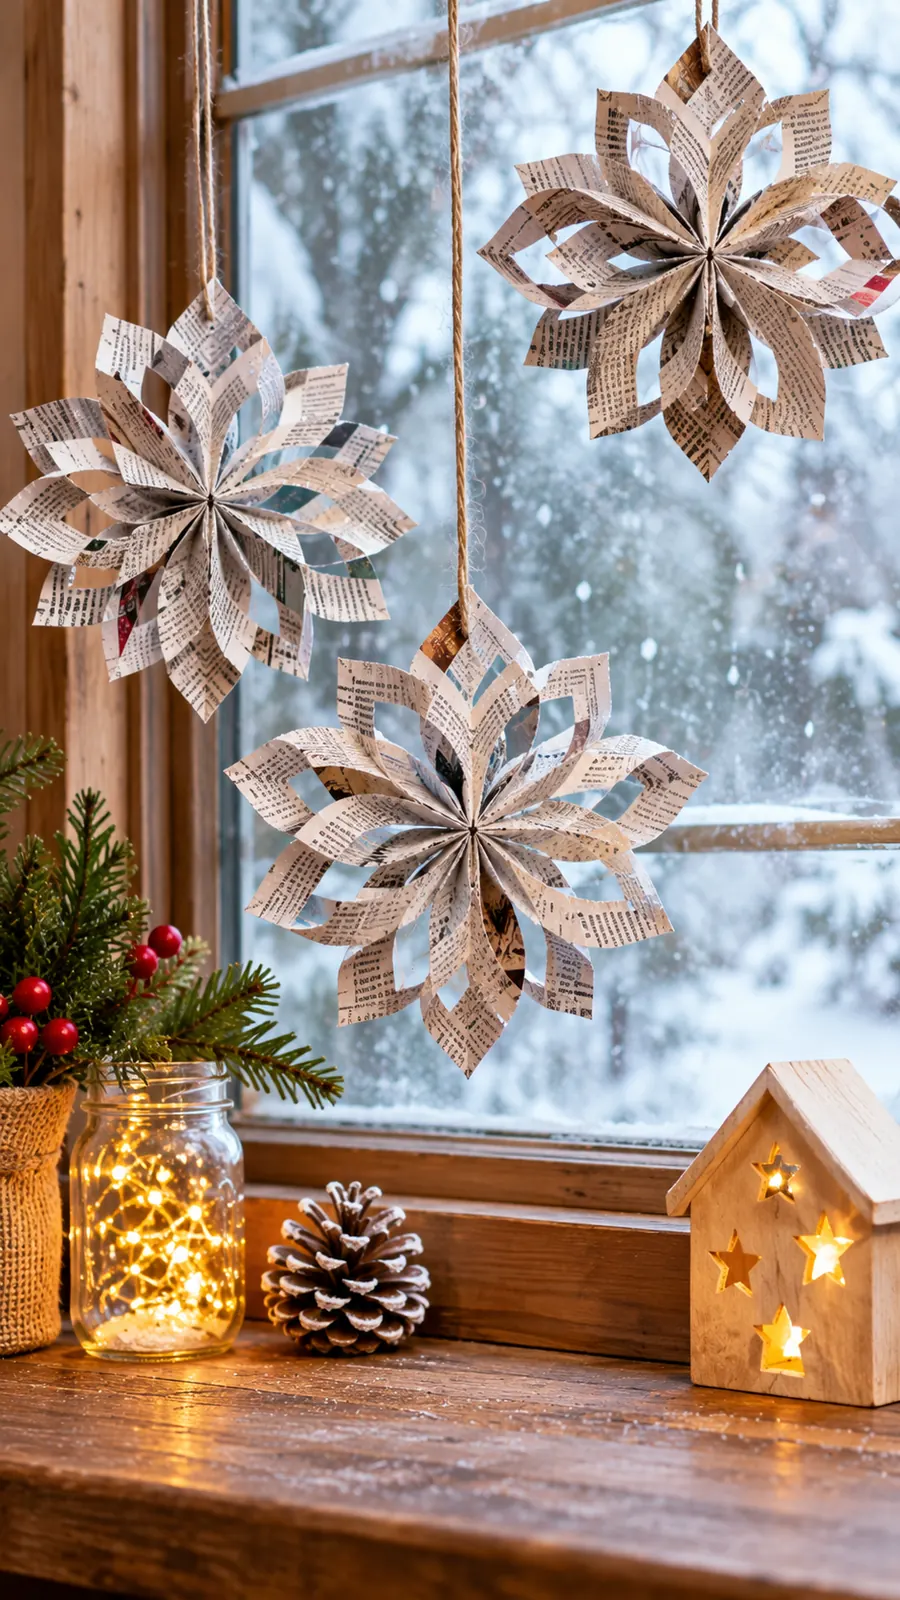
Start with a square cut from a clean newspaper page. Fold it in half diagonally and fold it again into a smaller triangle. An older child can cut simple shapes along the folded sides using child appropriate scissors, then carefully unfold the paper. For younger children, prepare the folds and help them make a small number of easy cuts. Flatten the finished snowflakes under a book before displaying them.
Make several sizes to give the window display depth. Attach them with removable tape on a clean surface, checking first that the tape will not damage paint or glass finishes. Save the best snowflakes between sheets of paper so they can be brought out next winter.
Bottle Cap Christmas Tree Mosaics
Plastic bottle caps in different shades can become a bold Christmas tree mosaic on a sturdy piece of reused cardboard. This is best for older children who enjoy arranging shapes and solving little design puzzles. The caps become reusable pieces of an art project rather than single use decorations.
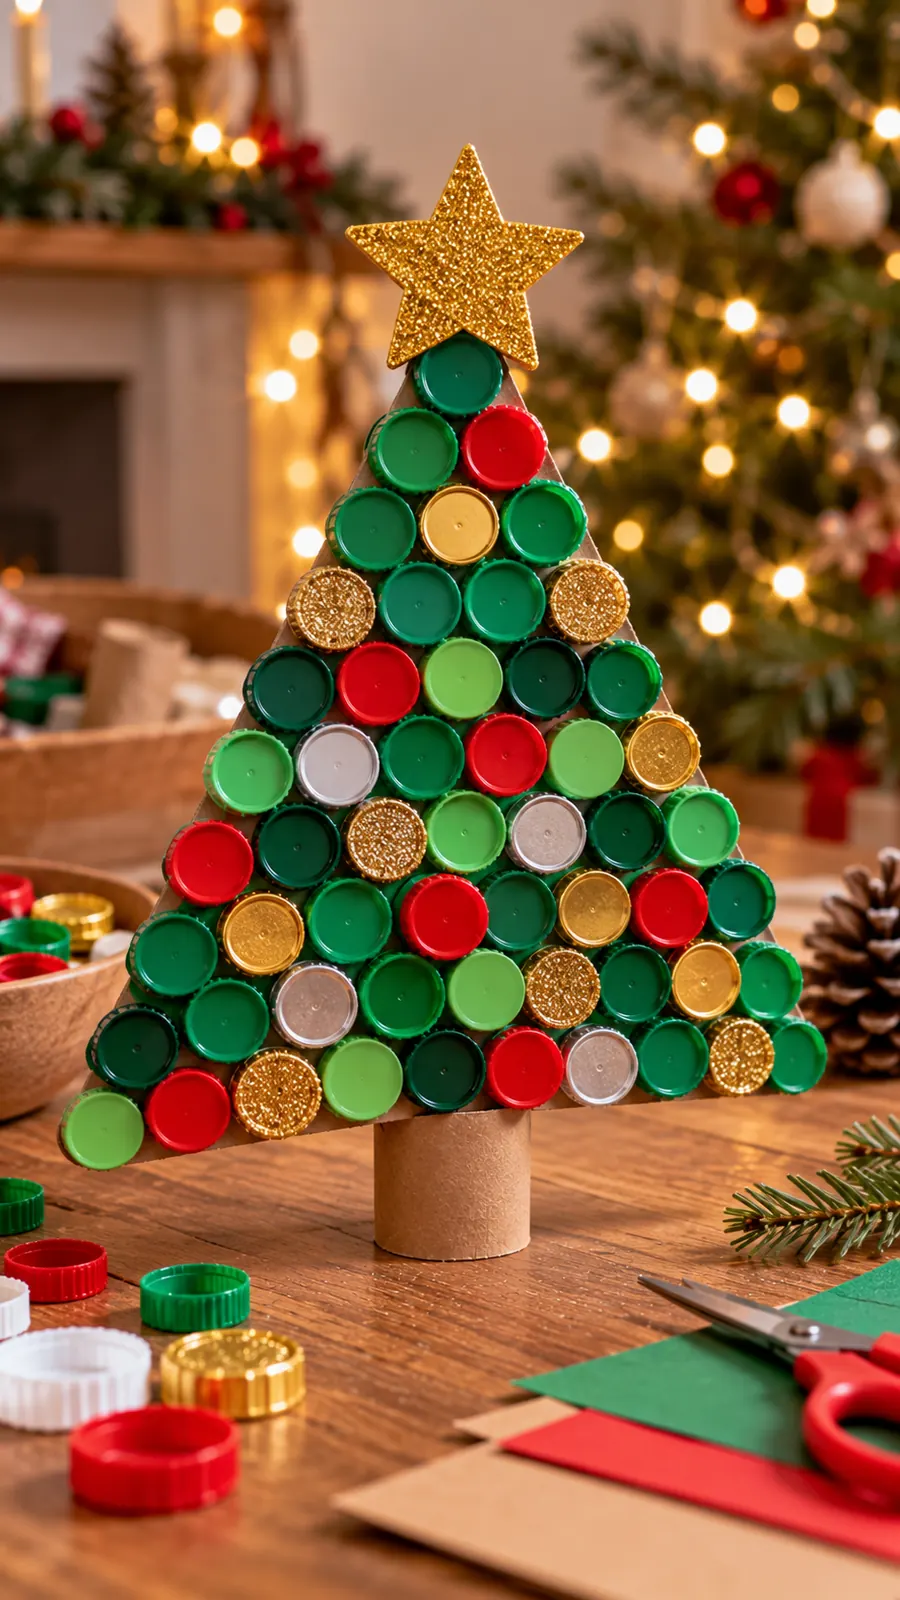
Wash the caps thoroughly, dry them, and sort them by color. Draw a triangular tree outline on packaging cardboard. Arrange green caps inside the shape, then choose a few bright caps as ornaments. Trace their positions before gluing so the design stays balanced. An adult should handle any adhesive that is unsuitable for children and supervise closely around the small parts.
Create a star from folded paper instead of using another cap. This project is not appropriate for children who may mouth or swallow small objects. Once the picture is finished, place it on a high shelf or hang it securely where younger siblings cannot reach it.
Reused Wrapping Paper Christmas Cards
The small pieces of gift wrap left after opening presents often have patterns too pretty to throw away. Turn those scraps into Christmas cards for grandparents, teachers, or neighbors. Even tiny pieces can become trees, baubles, and colorful borders.
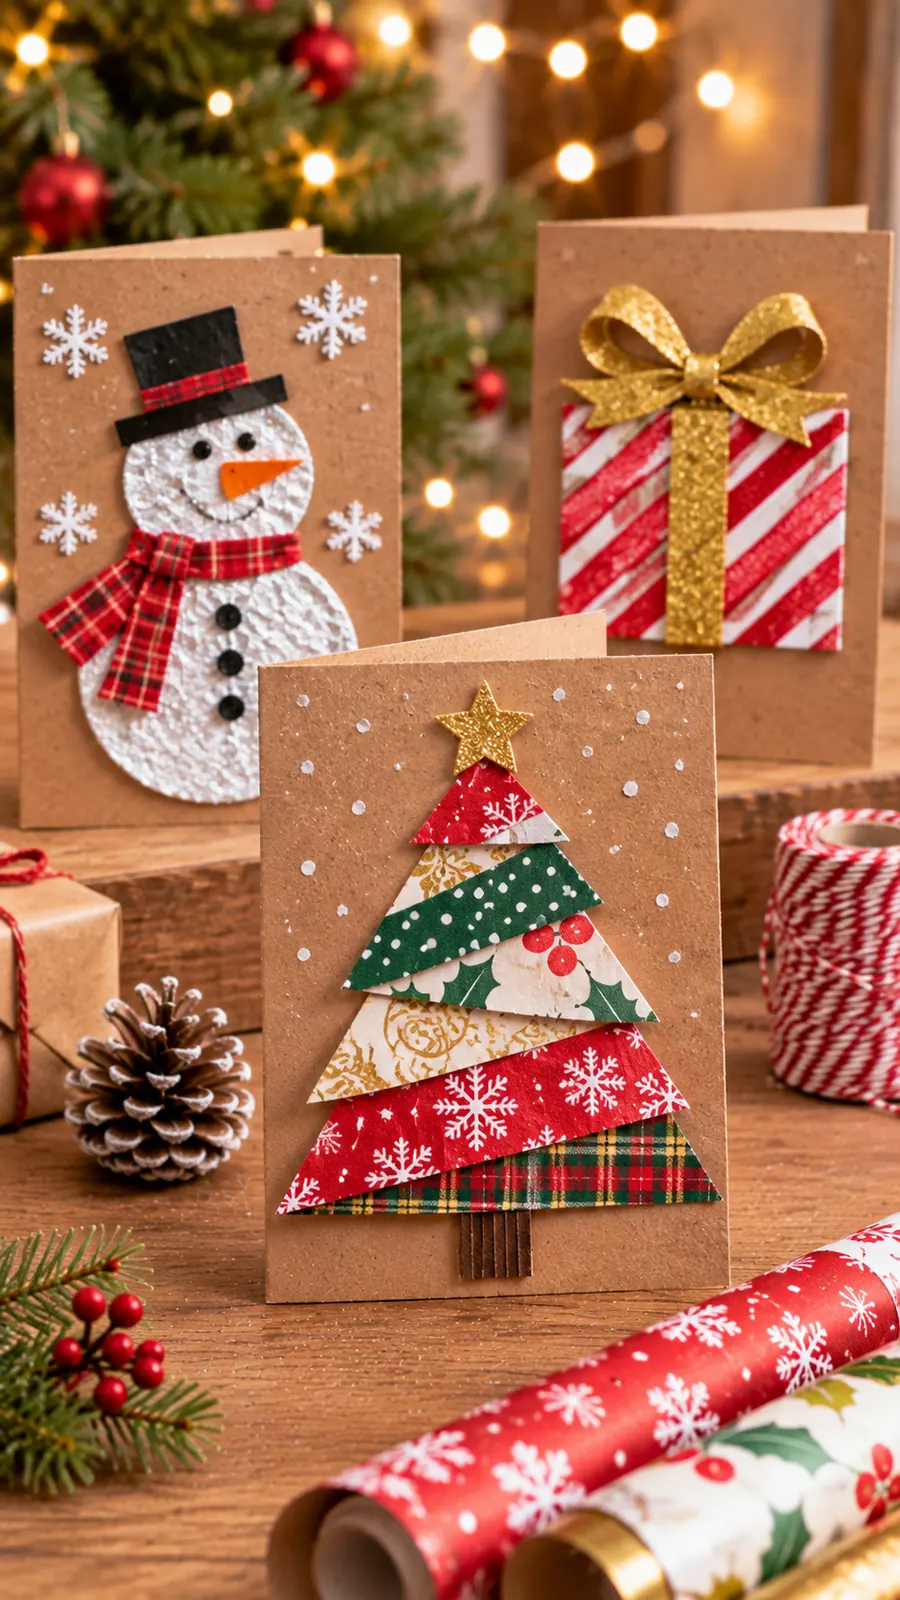
Fold a clean sheet of used printer paper or lightweight packaging card in half. Cut simple triangles from wrapping paper to make a Christmas tree, or arrange circles into a wreath. Glue the pieces onto the front and draw extra details with markers. Encourage children to write a short personal greeting inside. A younger child can add fingerprints or a drawing while an adult writes the words they dictate.
Set aside reusable gift wrap as presents are opened and keep it flat until craft time. Mixing several patterns adds personality, but leaving some empty space around the design keeps the card readable. These cards are practical, personal, and inexpensive to make.
Cardboard Tube Angel Choir Decorations
A small choir of angels made from cardboard tubes can decorate a mantel or become part of a holiday play scene. This project uses mostly paper and encourages children to express themselves through faces, costumes, and color choices.
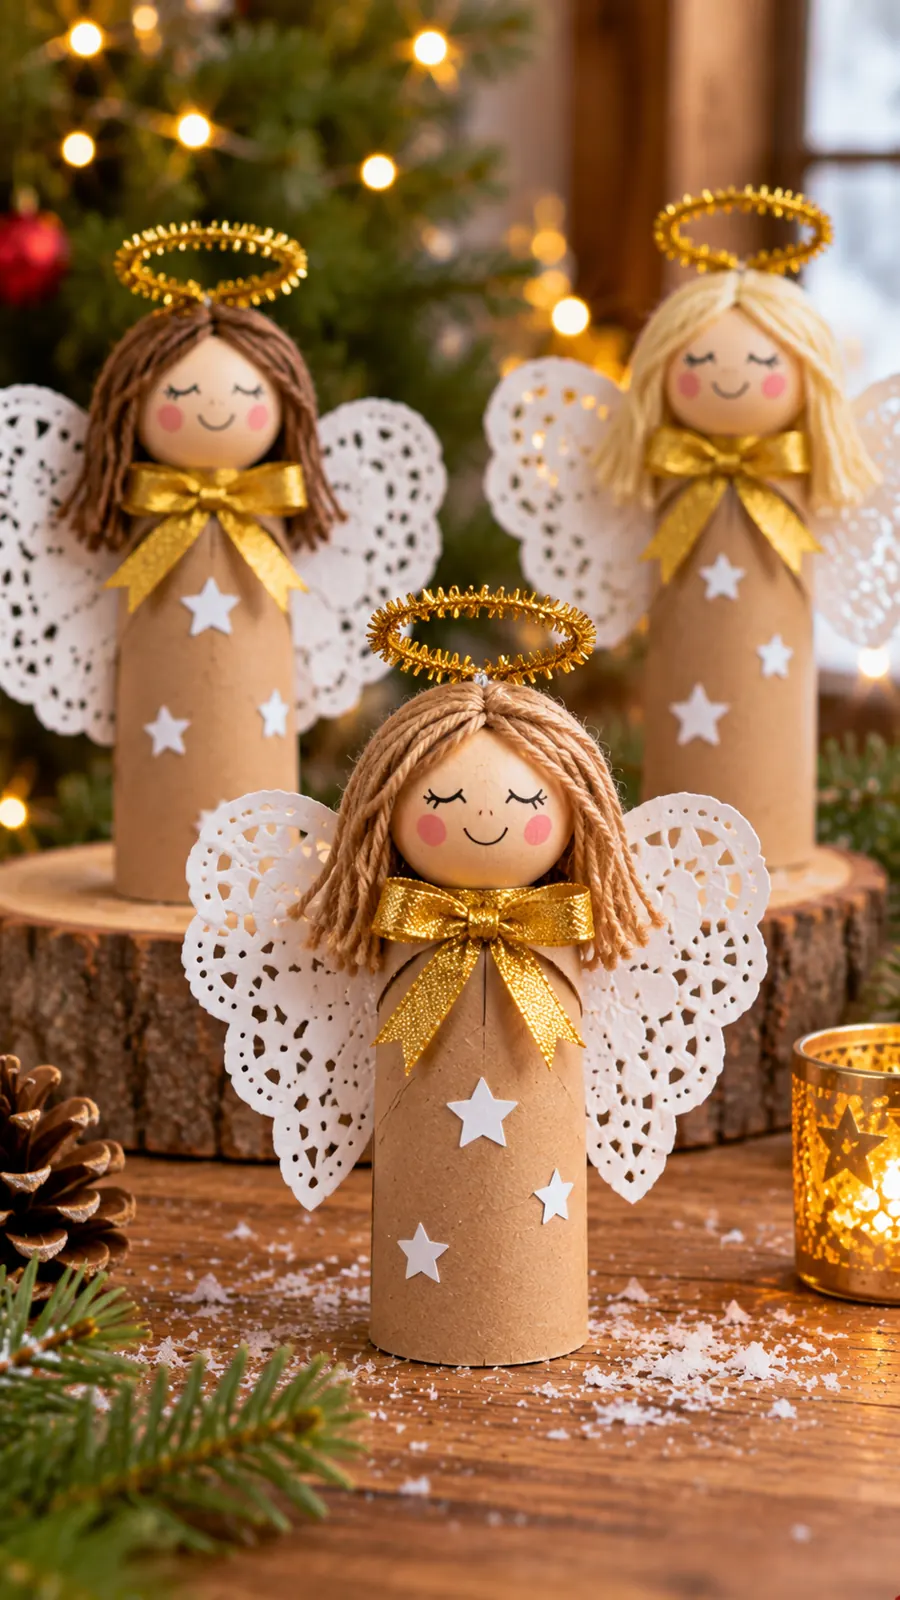
Cover short, clean cardboard tubes with white or patterned paper. Cut simple wing shapes from cereal box cardboard and attach them to the back. Make a round face from spare card, draw an expression, and fix it near the top. A paper circle behind the head can suggest a halo without requiring any wire. Let the glue dry before standing the figures upright.
For a coordinated choir, give every angel the same color outfit but different wings or hairstyles. Children can arrange them in rows on a reused tray. If a tube tips over, glue a wider cardboard base underneath. Keep fragile details simple so the figures survive storage.
Shoebox Christmas Village With Scrap Paper
An old shoebox offers enough space for a miniature Christmas scene that combines several recycled materials in one imaginative project. Unlike a single ornament, this craft invites children to plan a setting and invent stories about the people who might live there.

Remove the lid and turn the box onto its side to create a stage. Cover the back with blue paper from old magazines or reused gift wrap. Cut cottages and trees from cereal box panels, then fold small tabs at their bases so they can stand. Add snow from torn white paper and a pathway from brown parcel packaging. Let children position the pieces before gluing them down so they can experiment with the arrangement.
Keep the shoebox lid to protect the village between Christmas celebrations.
Gather and Prepare Recycled Craft Materials
A little preparation makes DIY Christmas Crafts for Kids Using Recycled Materials much more relaxing. Collect clean cereal boxes, cardboard tubes, paper bags, fabric offcuts, paper packaging, magazine pages, and leftover ribbon in a dedicated container. Set aside dry materials that are free from grease, sharp edges, and strong odors. Keep potentially contaminated food packaging out of the craft box. Instead of buying a large selection of new decorations, begin with washable paint, paper glue, markers, and child appropriate scissors already at home.
Organize materials by type before children start. Precut thick cardboard, set out an easy to clean work surface, and give everyone a small tray for their pieces. For preschoolers, prepare basic shapes so they can focus on arranging and decorating. Older children can sketch their own design and decide which scraps fit best.
Choose Crafts by Age and Keep the Activity Safe
Children develop cutting, folding, and gluing skills at different rates, so adapt the activity rather than expecting identical results. Preschoolers often enjoy paper chains, large collages, and painting prepared shapes. School age children may be ready for folded snowflakes, house construction, or detailed cardboard decorations. Choose blunt tip scissors where appropriate and supervise the entire activity, especially when tools or small components are nearby.
Adults should handle craft knives, sharp hole punches, difficult cardboard cutting, and any hot equipment. Skip glass, sharp metal, exposed staples, loose magnets, and small bottle caps when younger children are participating. Keep all paper decorations away from open flames and heaters, and never add real candles to cardboard houses. Wash hands after sorting materials and clean the table afterward. The best project is one children can finish safely and enjoy, even when the result looks different from the example.
Store and Reuse Your Handmade Christmas Decorations
Recycled materials can last for more than one holiday when children make them carefully and families store them thoughtfully. Let glue and paint dry fully before packing anything away. Place flat cards and snowflakes between sheets of scrap paper; nest lightweight cardboard figures in a small box; and wrap delicate projects in clean reused tissue paper.
Label a storage box with the year or the child’s name so everyone can rediscover the work next Christmas. Repair a broken paper chain by replacing a few links rather than remaking the entire garland. At the end of the decoration’s life, separate mixed materials where practical and follow your local recycling guidance. Reuse comes first, and recycling rules can differ across communities.
Conclusion
DIY Christmas Crafts for Kids Using Recycled Materials turn ordinary household scraps into decorations and memories with a personal story. Start with a paper chain or simple cardboard star, then try a house or miniature village as confidence grows. Let children choose colors, invent characters, and celebrate their own creative decisions. With thoughtful preparation, safe tools, and a storage box for finished projects, many of these cheerful creations can return year after year.